
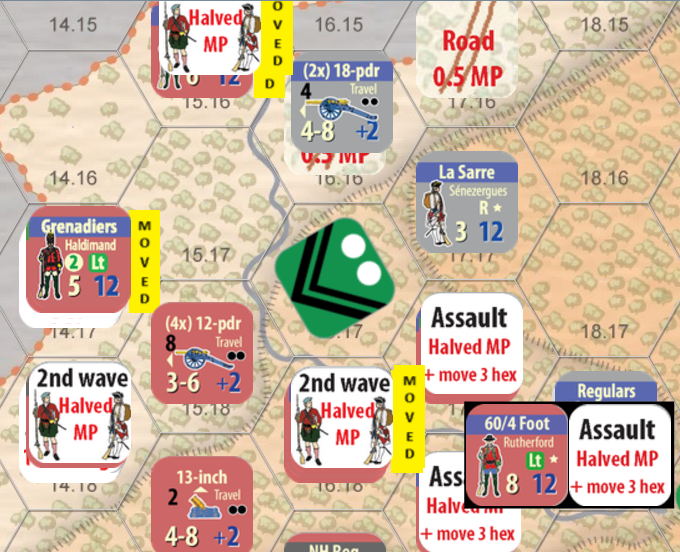
Next comes the assault. Two stacks go against a combined 3 SP strong Grenadier & Canadian defense behind a level two redoubt. The British have artillery which will fire first (technically artillery fire is resolved after all movement has been completed, but it makes no difference in this case). Six heavy guns had been brought up to bombard the French along with a single heavy 13-inch mortar. This is the main firepower of the British army in the whole area of operation. One small mistake I made was to use both of my artillery leaders with the Artillery Castles and only leave the naval commander to support unloading the artillery. This deprived me of +1 DRM bonus here…
I need to roll 3 or higher to hit the fortification with some effect. And I rolled a 3! Phew! Next roll for the impact – with the heavies only, it’s a guaranteed “hit” due to a column shift right (meaning has an effect on the target). The result is a 7 destroying the redoubt completely – big guns can be very effective! No other damage is inflicted.
Next, the massive mortar goes into action. It fires shells weighing 200 pounds, or 90 kilos!
Firing from two hexes away, it gets a -1 to hit and ends up just missing the target.
17 SP are going against 3 SP – that is a 5:1 odds. Even the redoubt would only have taken it down to 3:1. I need to resolve each stack separately using the same odds. As all assaulting troops are now regular infantry, none of them are halved. Before commencing, I have to pass the leader roll and it might be close because Gage is my leader and he isn’t that good. And he fails! There goes the better odds, but it might still work out with the two good stacks going in.
I’ll do the larger attack first. The Black Watch (9SP and +1 DRM) attack across a stream (-1 DRM) led by Gage (+1). The roll is 6 and net DRMs are +1, making it a 7. Result is a step loss, disruption and retreat for the defenders. Canadians take the loss and both units pull back three hexes. The 42nd Highlanders advance in to the hex in the middle of the enemy line and things are about to get messy here. The other stack stays put. As an assault target is captured, if they can hold on to it till the end of the phase, Morale goes up by 2.
There are three more French hexes with adjacent British units who only have troops on two hexes. The British have to either split one of their stacks to engage all three or accept the fact that one of the enemy stacks is reinforced by the adjacent French troops not involved in combat (albeit adjacent to the British/Provincials units). The latter might be a better option.
I am cautious with Bradstreet. By leaving him behind, there is a smaller possibility of losing him in combat should one of the stacks actually breach into the line. It can get bloody, especially if a weak unit breaks into a mass of enemy troops. They’ll fight till nobody is adjacent and there can be many chances of getting him killed. I don’t want to lose all my key leaders on this one day as the replacement leaders are weaker.
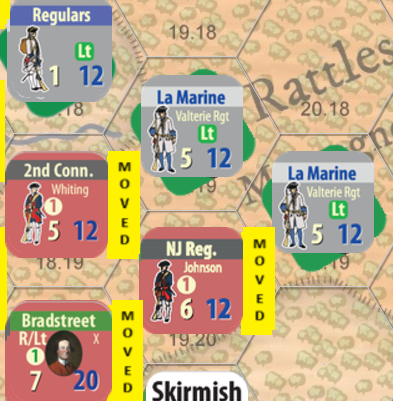
“First” attack goes in with 10 SP Provincials halved to 5 SP (due to the redoubt) against the entrenched 3 SP La Marines and Regulars. 3:2 odds drops two columns down to 2:3. There is -1 DRM for the Provincials (they both are “-1” but these are not added up, but the modifiers just remains at -1), -1 DRM for crossing the stream and +1 for Bradstreet in the background.
Roll is 6, modified down to 5. Result is -1D, actually not too bad 🙂
The last attack here has 10 SP of irregular infantry with -1 DRM attacking the dug in 5 SP La Marines supported by 3 SP from the adjacent hex (half of the SPs on that hex). Irregulars are halved against entrenchments, so ultimately we have 5 SP vs. 8 SP and one more column shift against the attacker. DRMs cancel each other out. This doesn’t look good at all.
The roll is 2 and results in a hefty -2DM*: two step losses, an Army Morale point loss and a leader loss check for Bradstreet. That roll goes bad – it’s a 2 and Bradstreet goes down! With him also goes an additional Morale point and 2 SP of Bateaumen who decide to take off and leave the battlefield (from any Bateaumen unit). It’s a hard choice to have a leader to lead an attack – their DRMs are often crucial for the outcome, but it can come with a heavy price. I removed the 2 Bateaumen (battoemen, … whatever) from those on the other side of the lake.
The Second Wave
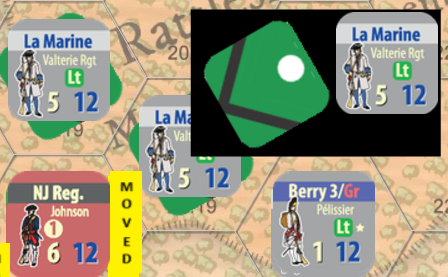
After the first round of combat, I can move my reserves, i.e., the 2nd wave units. I will take some risks and attack Sénezergues and his merry band of Berry-men once more. Although there is rule for max. two attacks against a single hex, that does not include any combat that will be required once a unit has either advanced or retreated into a position where combat is required (being adjacent to the enemy).
Two regiments of regulars move into position to protect the artillery in forward positions. Although they are protected by friendly ZoC, an advance – which would be foolish – by the French could lead to losing some of the heavy guns.
Round #2
In the first round the British achieved two incursions into the French line. The one by the lake is quite interesting and the other one achieved by the Highlanders still hangs in the air – it will be a slugfest for sure. Fighting isn’t over yet and soldiers don’t just sit down once they are inside the enemy positions and start brewing tea. The British are surrounded by hundreds of French and Canadian whose only goal is to kill them all.
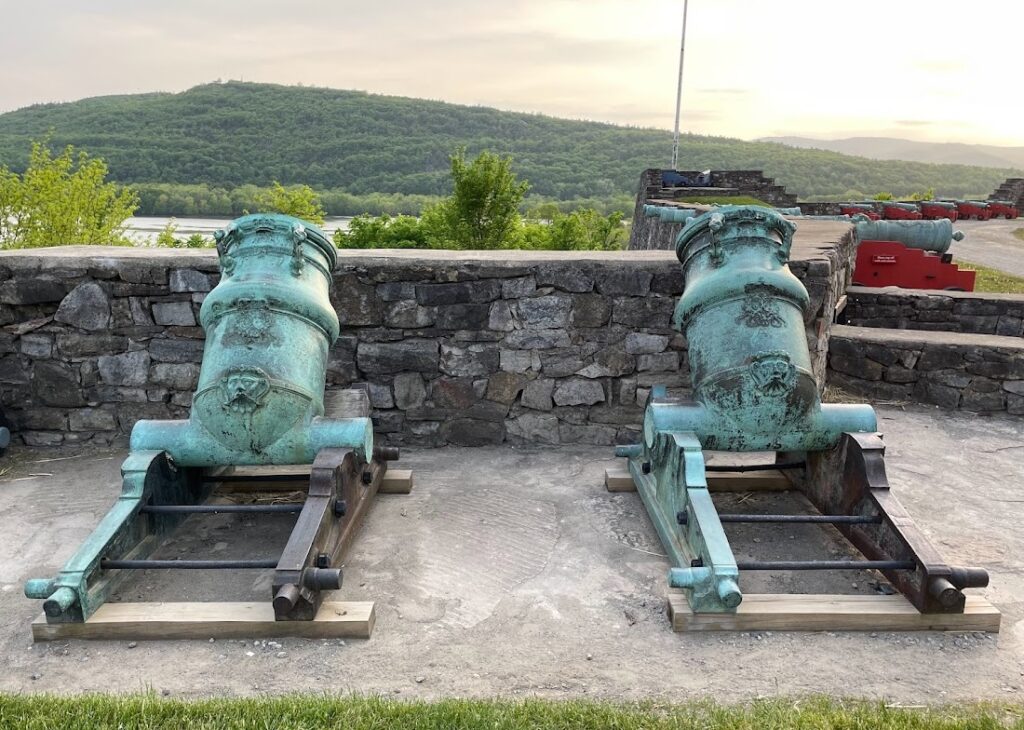
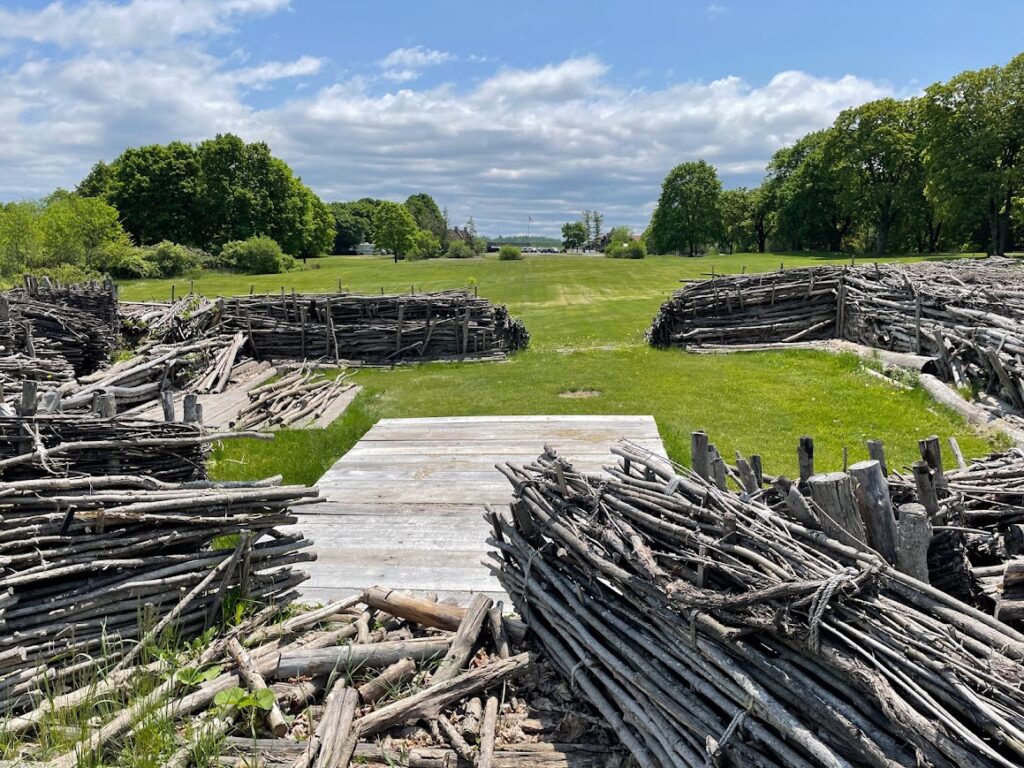
First those Grenadiers and Bateaumen on the shore turn their eyes on Sénezergues and his Berry Regiment. The fortification only protects from three sides – not all around. This was a design decision to balance between x lines of rules (x is not a small number) and the common historical design, as seen below. I actually had this in an early version of the rules and it got messy. You need tons of extra counters to cover various situations which might arise.
10 SP will attack uphill (-1 DRM) comprising of 6 SP of 42nd Regiment (+2) and 4 SP of Bateaumen. 4 SP defend with their leader providing a -1 to the attack. So, odds are 2:1 and no modifiers. Let’s roll the die!
Boom! A Zero!
Result is thus -1DM* – but there is no leader attacking, so we can ignore that. One step loss for the Grenadiers and a retreat plus yet another morale hit… A disappointing result, indeed.
And then I find bugs in my Vassal, again 🙁
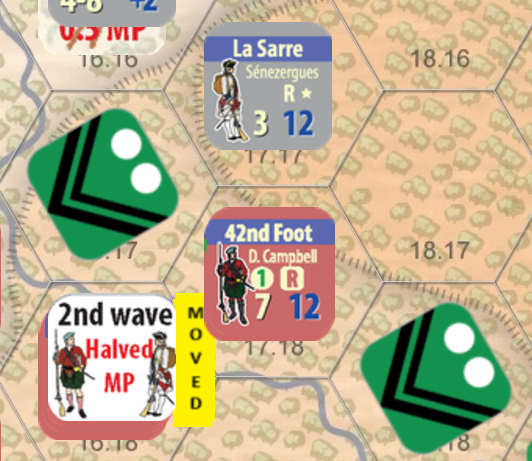
Before shutting down to rectify my counter rules in the module, I’ll finish off some combat. Campbell’s Highlanders with then-Colonel Thomas Gage (of Revolution fame) in the lead charge against the Berry: 9 SP (+1 DRM), Gage (+1) vs. 4 SP Berry and Sénezergues (-1). There are no other modifiers and the Scots are coming behind the earthworks.
The result forces the French to retreat, but no casualties are suffered by either side. They are lucky, as the backup unit behind them spares the retreating French from suffering losses from the EZoC – they are able to slip away unharmed.
I decided to not move the Highlanders into the vacated hex as I want them to now switch their attention to the other side of the French line and try to roll it up.
Before they can attack again, the 60th Regiment (4th Bn.) must go first. 8 SP vs. 3 SP, two levels of fortifications (-2 columns), +1 DRM from adjacent Gage and -1 for the stream. Final odds are 1:1 and no modifiers. I should have brought in a small unit to support them…
Roll is 2, so one step loss and disruption. The British losses keep mounting with little progress.
Now the Highlanders can go again. I removed the Assault mode marker, it plays no role anymore. 9 SP against 3 SP is 3:1. As there is a contiguous defensive line, there is no column shifts involved – this action is behind the French lines. It is also the usual +2 DRM for the British (Highlanders and Gage).
And the roll is a 1. Maybe the British should just pull back and drink their tea, and try again tomorrow. Well, they do win this one, although suffer one step loss of 2 SP (being a large unit).
Again I decide to not advance the Highlanders into the hex. After suffering those casualties, it is better to go against the last remaining French unit in the vicinity, 3 SP La Sarre. It was Lt. Col. Étienne-Guillaume de Sénezergues’ own regiment, thus he is listed as the regimental commander on the counter. Those are for historical interest only and play no part in the game.
The odds are 2:1 with a final +1 DRM. Let’s see if the bad luck continues!
I rolled 7 with +1 it becomes 8! Not too bad! However, no casualties are taken by either side but the French have to pull back three hexes. Now this are has been cleared. The question is, will they counter-attack or start pulling back? I think we’re gonna fight, so I shall place the Highlanders accordingly. This means: stay put and don’t get cut off.
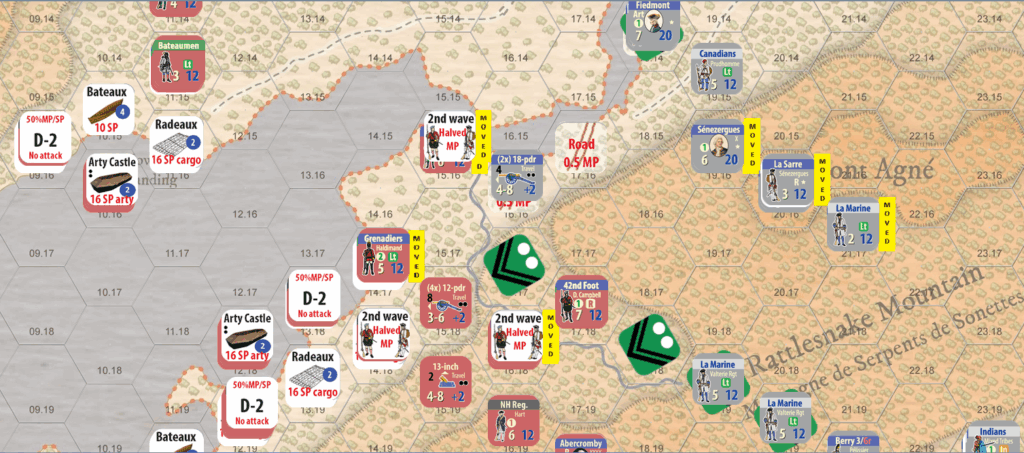
The end result of the British assault is above. Although the line was breached and the French were pushed back, I have to say this can still go either way.
To be continued!
Discover more from Flintlock Games
Subscribe to get the latest posts sent to your email.