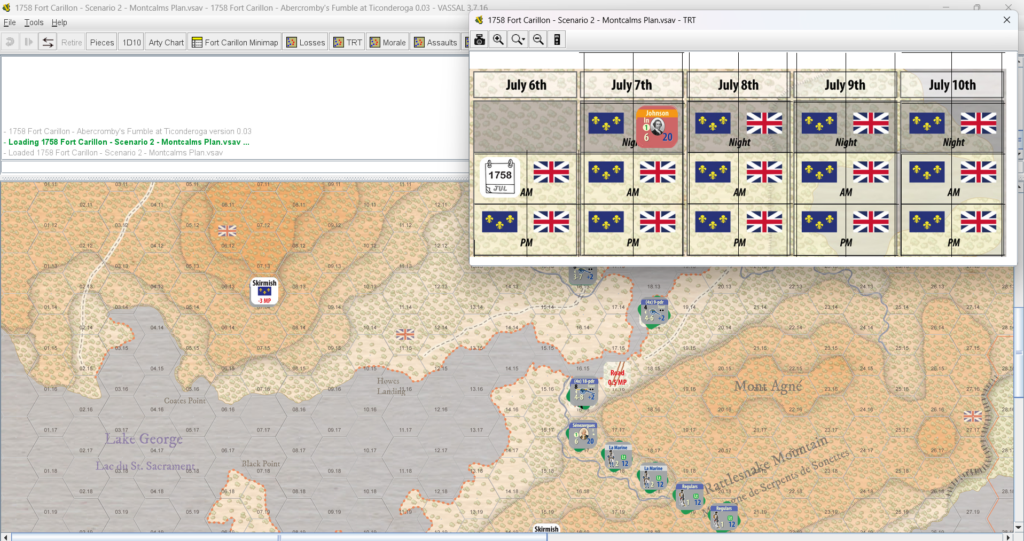
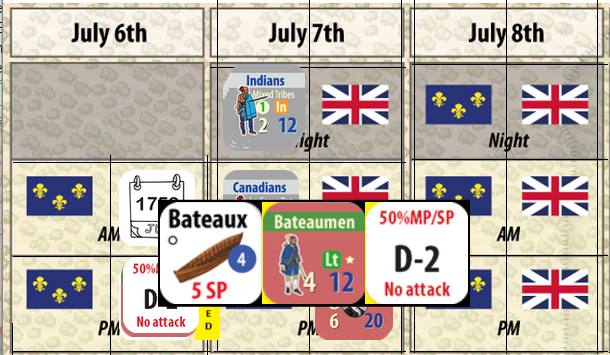
The night of July 7th was quite peaceful; both sides were regrouping after a day of heavy fighting. The French filled the gaps in their defensive line but remained steadfast, determined to stand and fight. They believed they were strong enough to wear the British down and eventually force them to admit defeat and retreat down the lake to the ruins of Fort William Henry.
Maintenance Segment
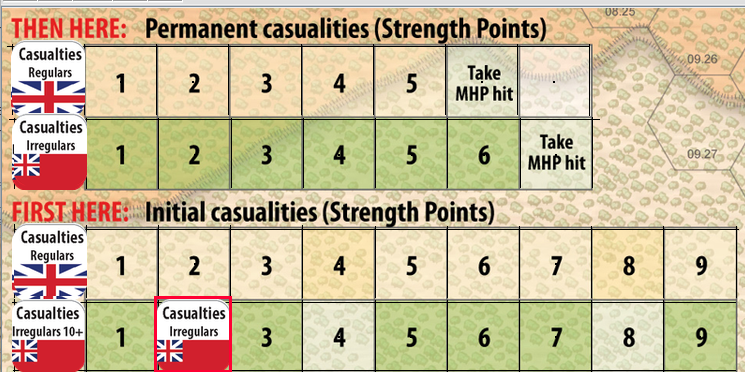
A new day begins with the Maintenance Segment, where replacements and other recovery actions are resolved. During this phase, one out of every four losses is returned to the fight.
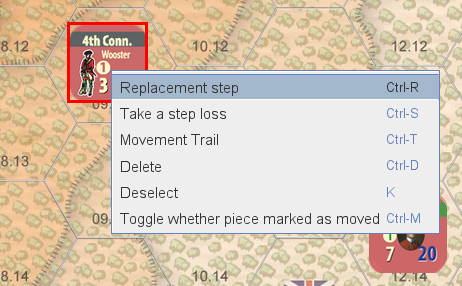
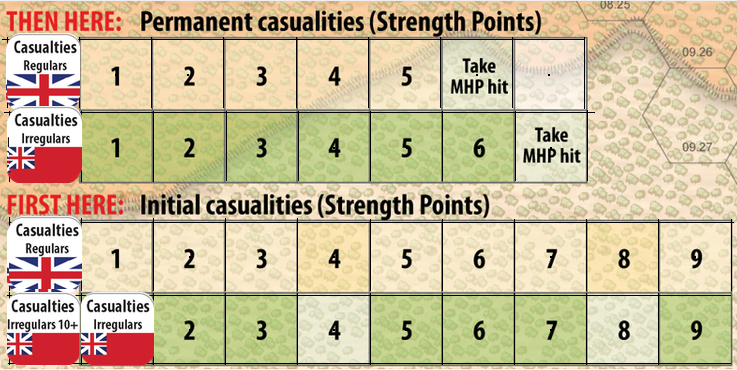
In the image above, the British regulars have suffered a total of 7 SP of initial losses. Losses are always reduced in groups of four: three SP are transferred to Permanent Losses, and one SP is returned as a replacement.
The irregulars have suffered 9 Strength Points (SP) of losses. These are reduced in two groups of four: 6 SP are moved to Permanent Losses, and 2 SP are returned to the battlefield as replacements. Both replacement SP are allocated to the NJ Regiment. The last 1 SP remains on the track.
Note that these are Strength Points, and a single replacement step may require either 1 or 2 SP, depending on the unit’s size.
French irregulars regain 1 SP.
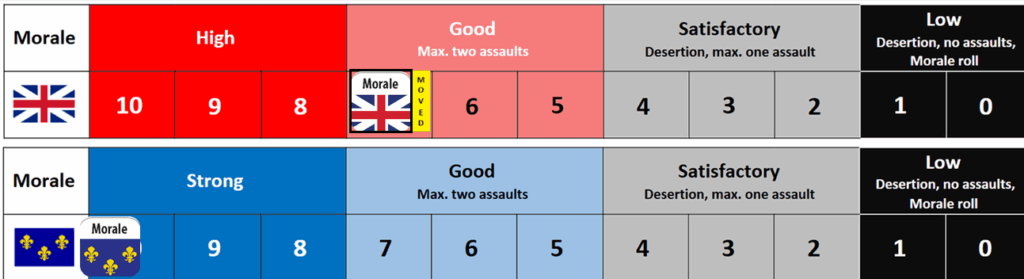
Due to insufficient supplies landing, the British lose 2 Morale points. However, 1 Morale point is recovered through the “Improve Morale” action, which increases morale by one step each day.
The British decide to commit to one assault, deducting 1 additional Morale point.
Morning Action Segment
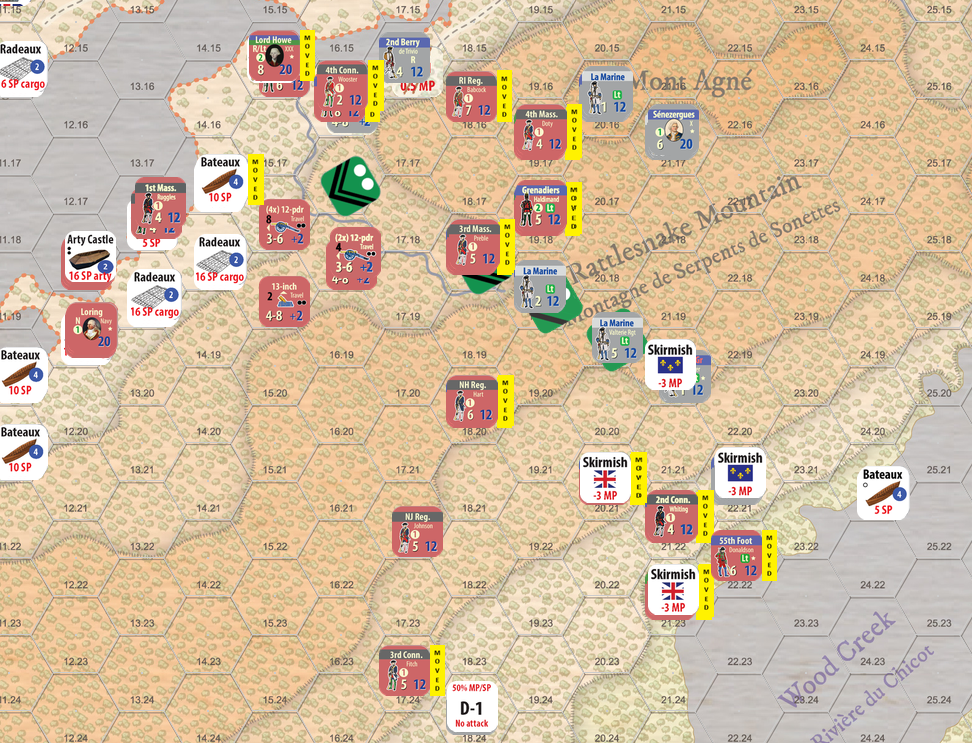
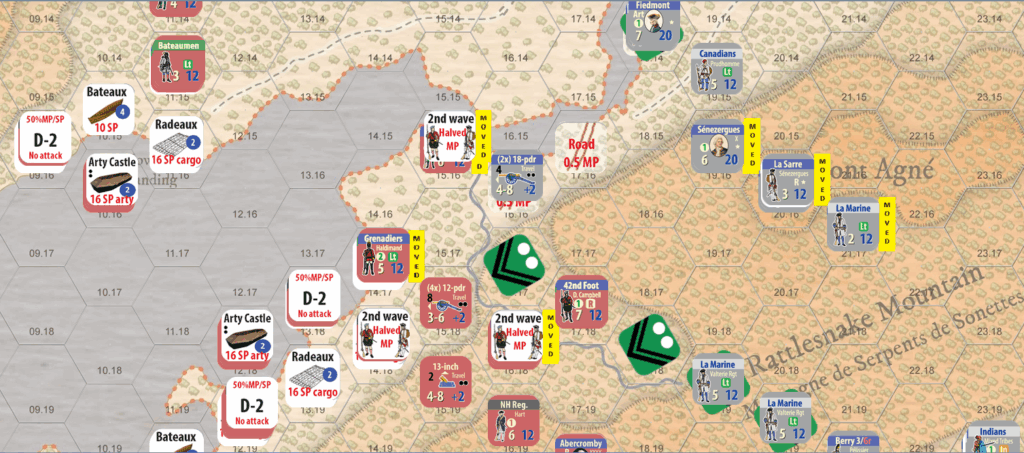
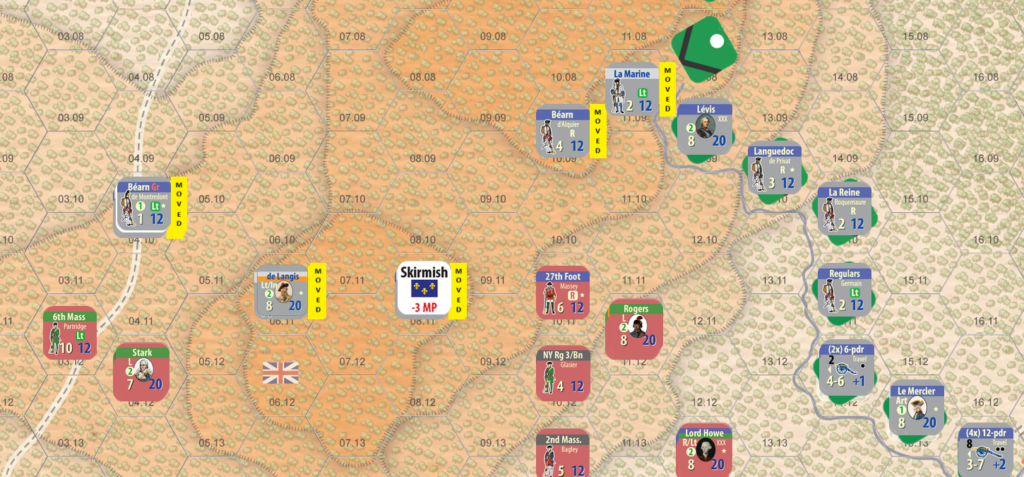
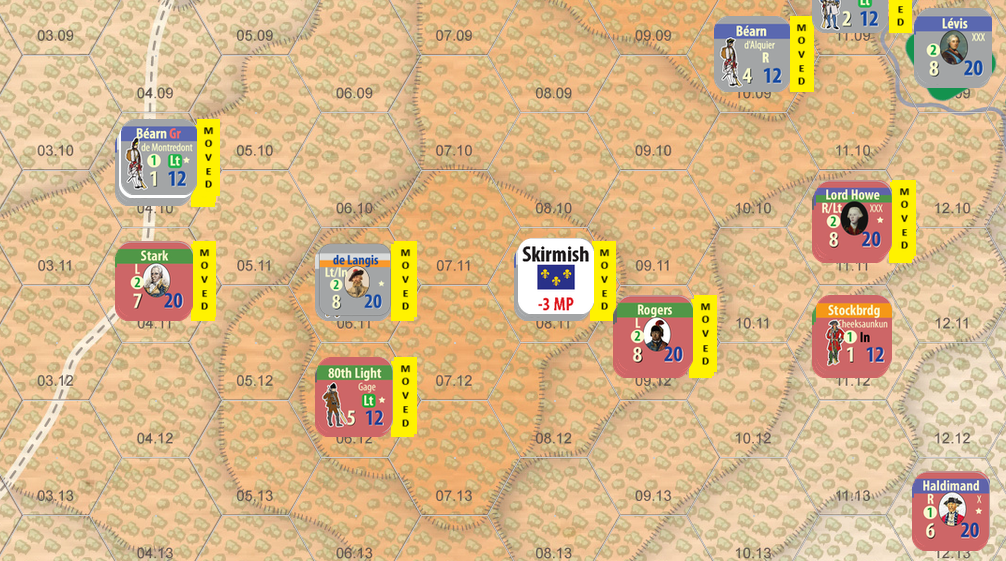
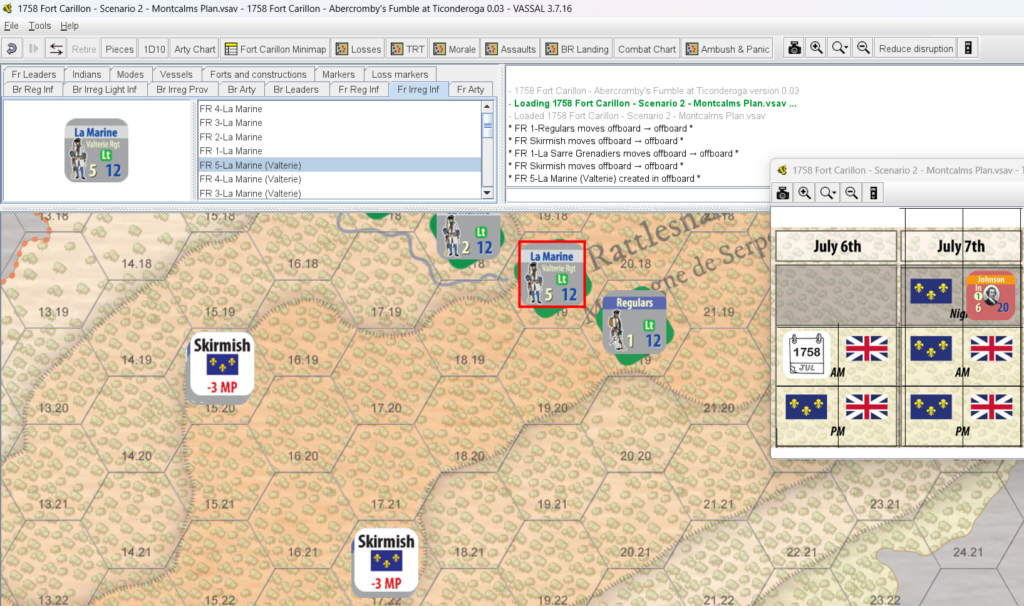
The main French force consolidates its line and prepares to continue fighting. During the quiet night, some French units built or improved breastworks (an easy detail to forget in solo play).
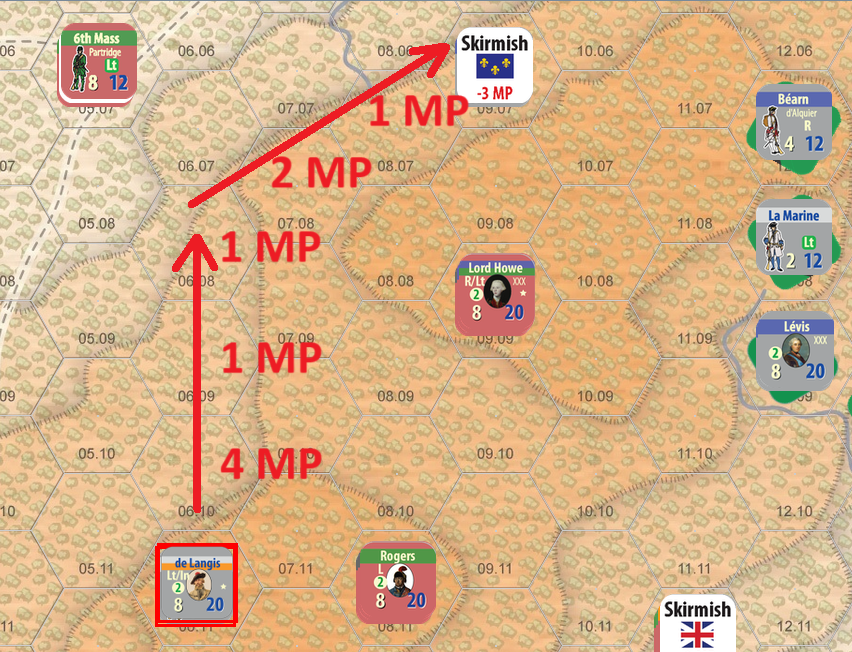
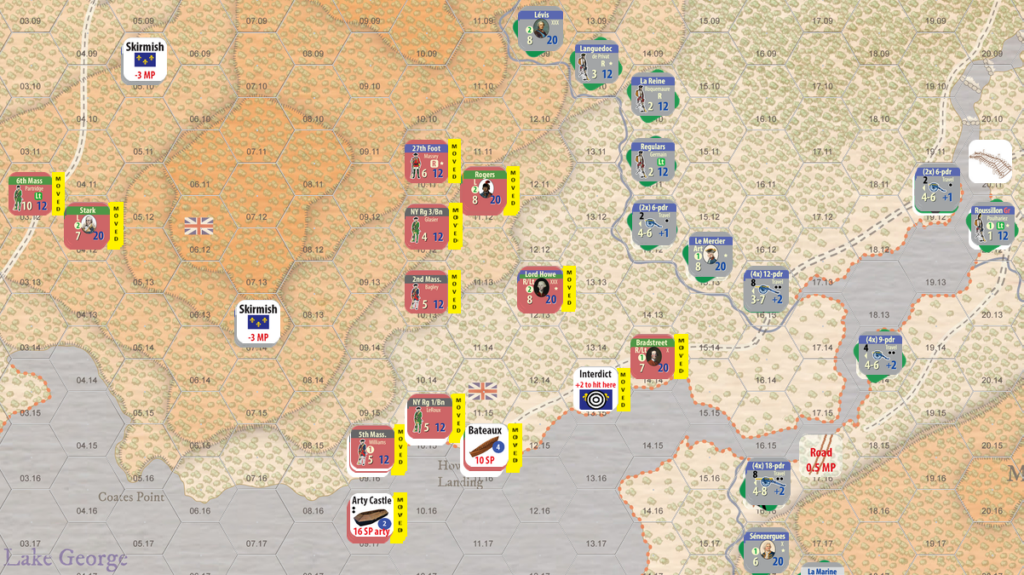
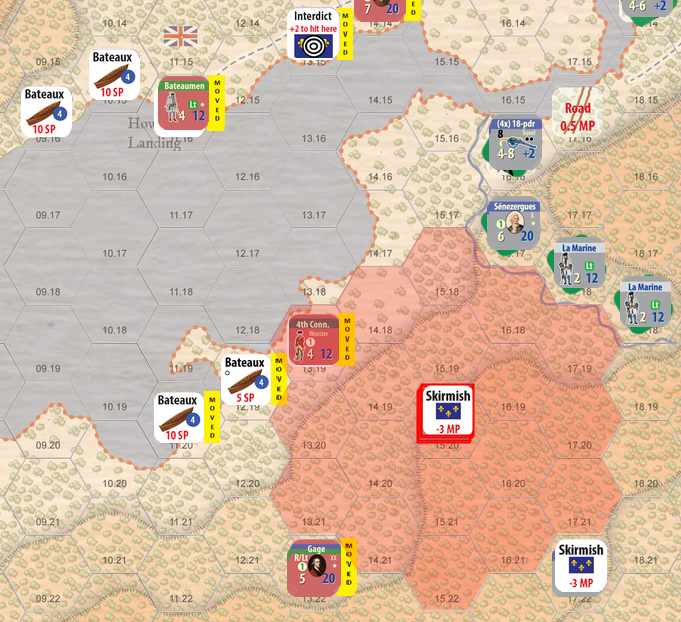
A small French Indian unit, which had previously failed to achieve success against shaken British forces, was able to regroup. Instead of withdrawing off the map (which would not incur a penalty), it force-marched through the morning mist across the hills toward the British landing area, hoping to surprise lightly protected artillery and supply units. However, on their own turn, Provincial troops moved into position and secured the area before the French could reach their target.
Artillery fire
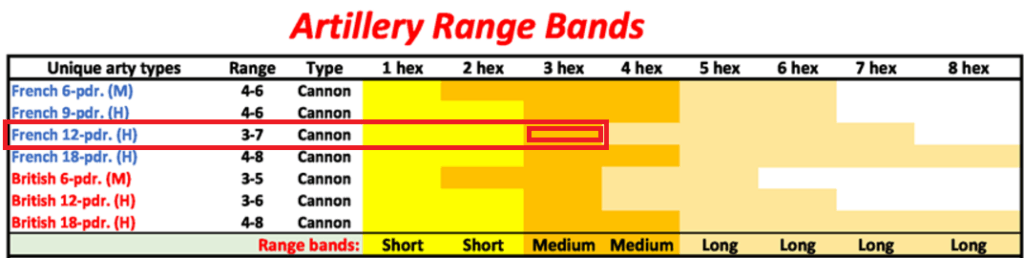
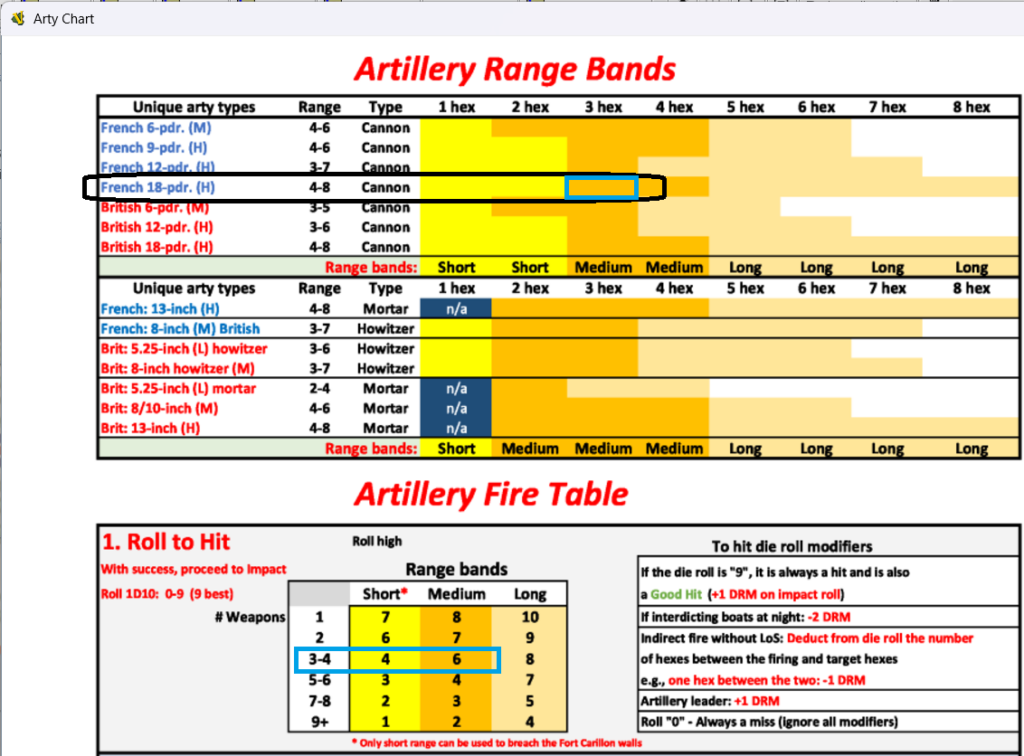
Before infantry combat, artillery fire is resolved for both sides.

I started with the French artillery facing Lord Howe’s troops (“Fiedmont” above). Rolled a zero for the French – an immediate and total failure.

Then rolled for the heavy cannons three hexes way – TWO zeros for the French in a row! A complete artillery disaster!
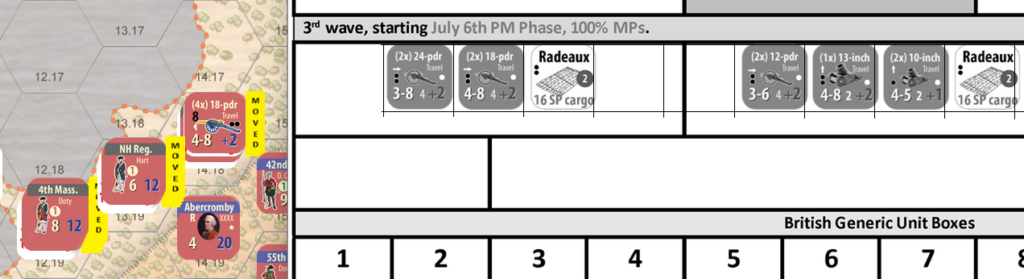
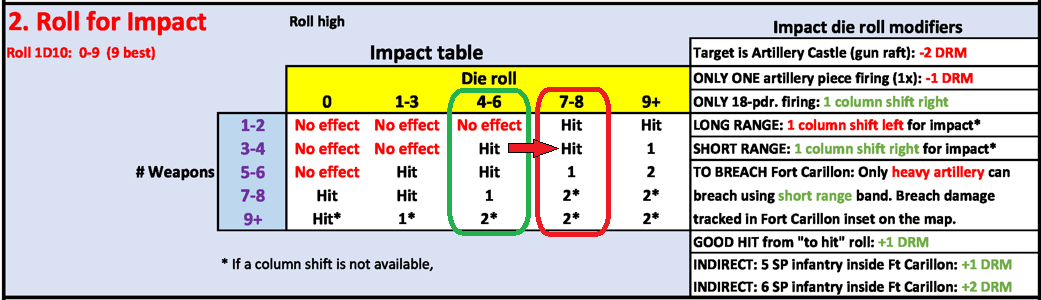
The British artillery takes its turn next. Captured French 18-pounders blast away against their previous owners – the same French artillery battery that just fired. Vassal is playing Jedi mind tricks – I rolled a 9 twice in a row for the British reducing the fortification.

As the fighting resumed, a British Artillery Castle advanced. On its first attempt, the French artillery missed at short range, but a second battery scored a hit and forced the vessel to withdraw.
I also brought in the second British Artillery Castle, which managed to push forward against the French position. By accident, it had mortars onboard—I had been using the old counter image, and after updating it, I realized I had intended to equip it with howitzers instead. Nevertheless, the mortars performed well, successfully targeting the heavier French guns further away (mortars cannot fire into adjacent hexes).
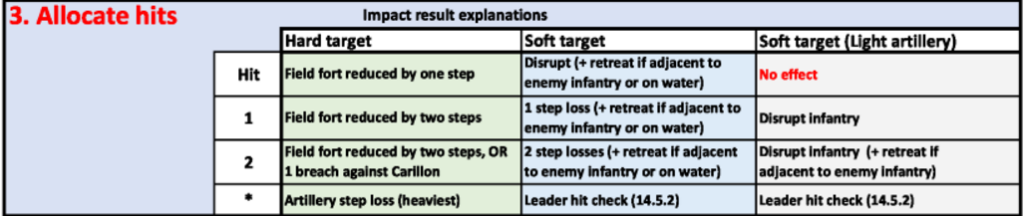
The third die roll, required to randomly determine which unit in the hex was hit by indirect fire, resulted in an eight. This inflicted a step loss on the 18-pounders, reducing them from four to two pieces. The Artillery Castle then withdrew behind the British lines.
Incursion
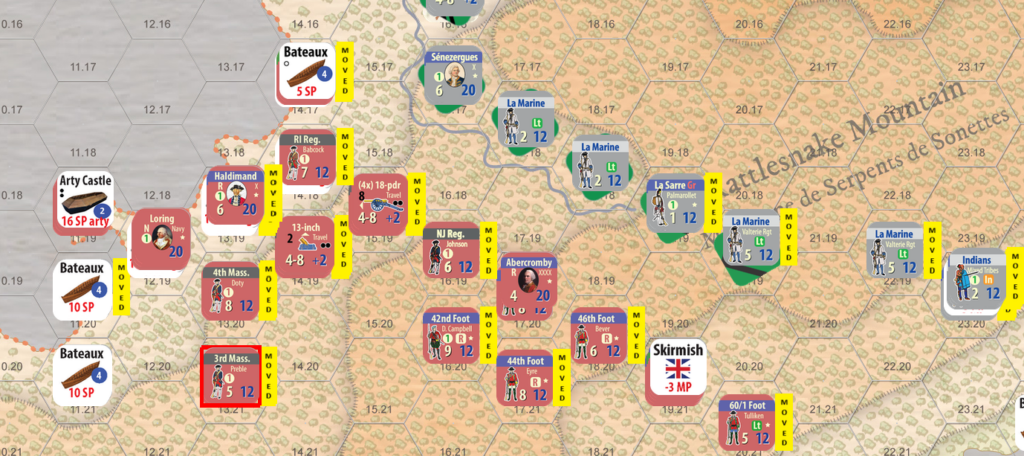
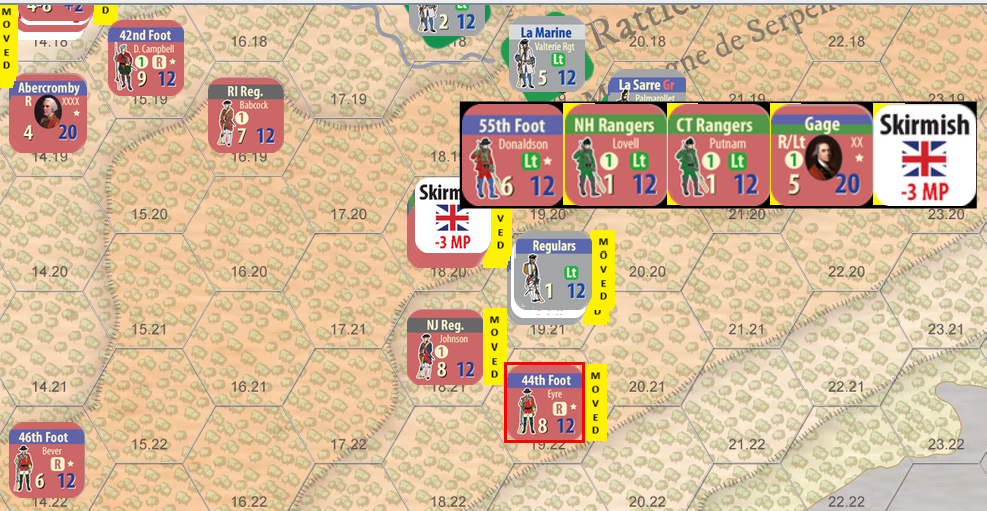
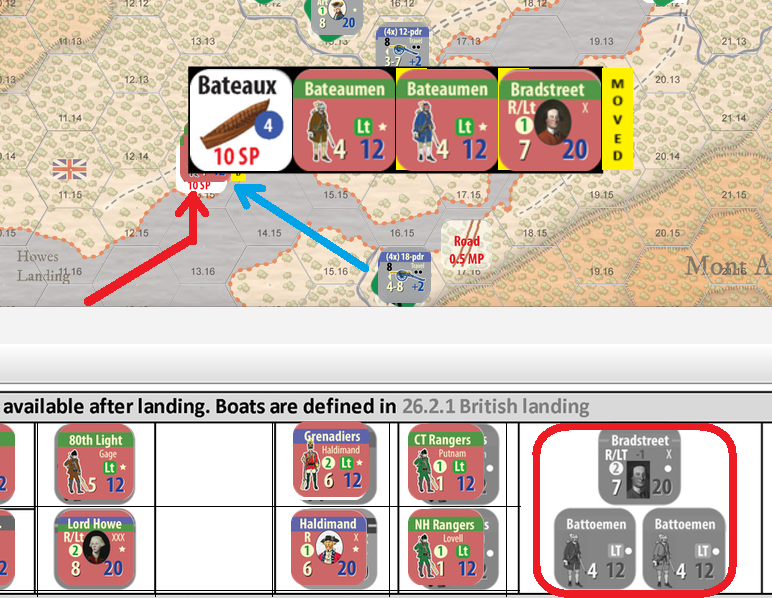
The British then made use of captured French bateaux left on the shore of Lake Champlain. The 55th Regiment, led by Putnam’s Rangers, quickly boarded the boats and sped toward the French artillery position guarding the mouth of the river.
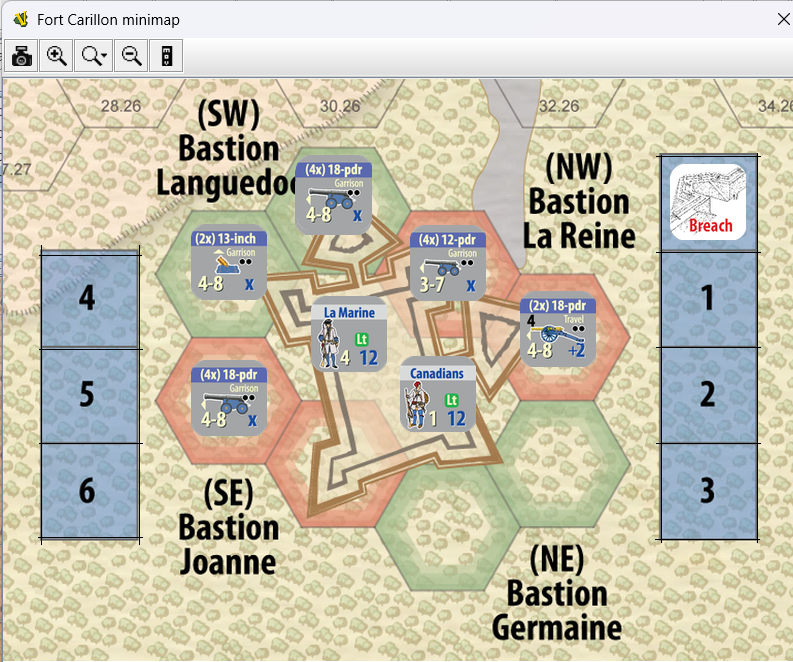
Because of their approach vector and the ample availability of supporting guns, the cannons at Lotbinière’s Battery fired at long range, with only a 10% chance to hit. They missed, and the cannonballs splashed harmlessly into the water around the speeding bateaux.
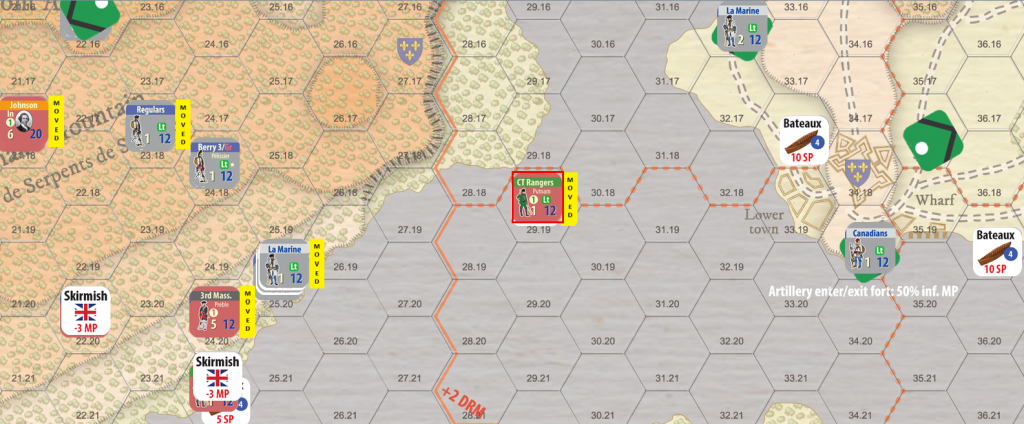
The light infantry continued rowing closer to the artillery position, keeping a safe distance from Fort Carillon and its heavy artillery. Four hexes was the closest range at which the fort’s guns could fire. Two nearby 12-pounders also fired but missed. However, the four 18-pounders from Carillon did not miss, even without the +2 to-hit DRM bonus. A second successful roll scored a hit, aborting the aggressive maneuver.

Main action
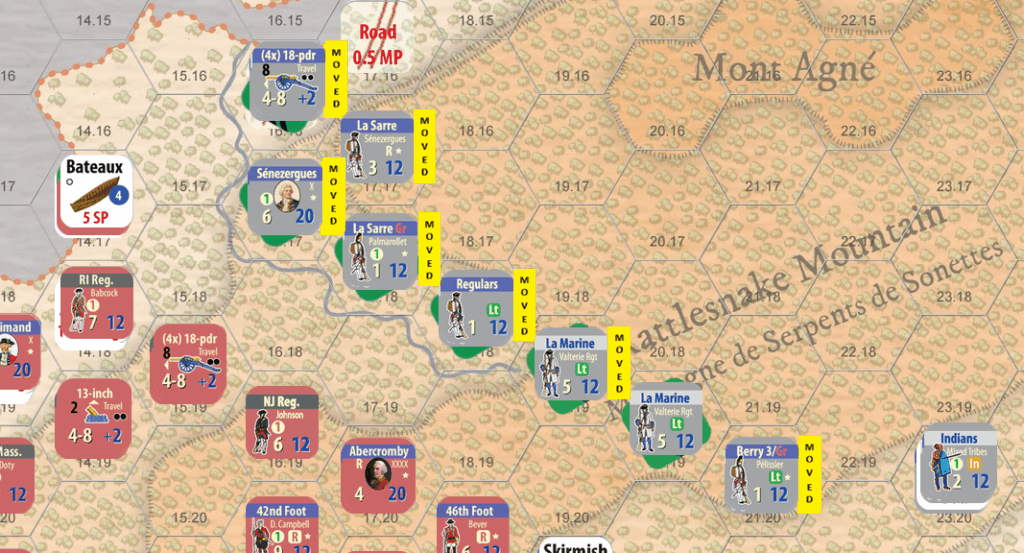
After the artillery action and the light infantry’s incursion, “the main action” begins. I’ll start from the top of the map.
Langy’s Canadians lost the engagement but there were no losses on either side – they pulled back and the British did not advance.
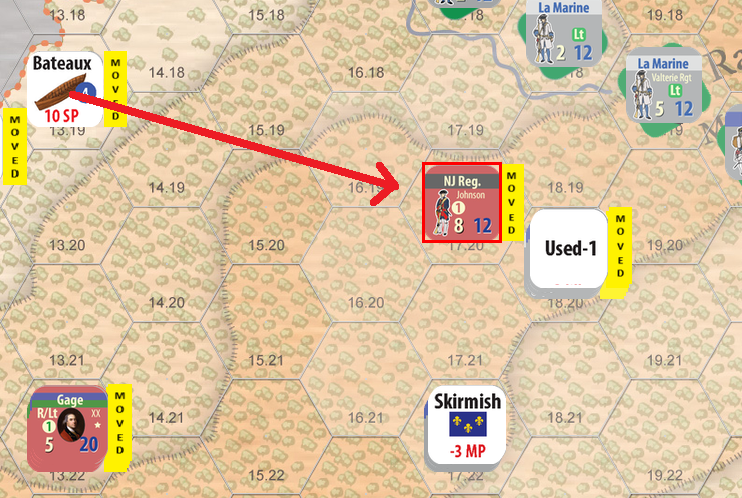
Howe’s attack against the 500 Canadians guarding the artillery was successful. After losing one SP, the French had to retreat and leave the remaining cannons behind. Finally, the road is starting to open up towards the portage road.

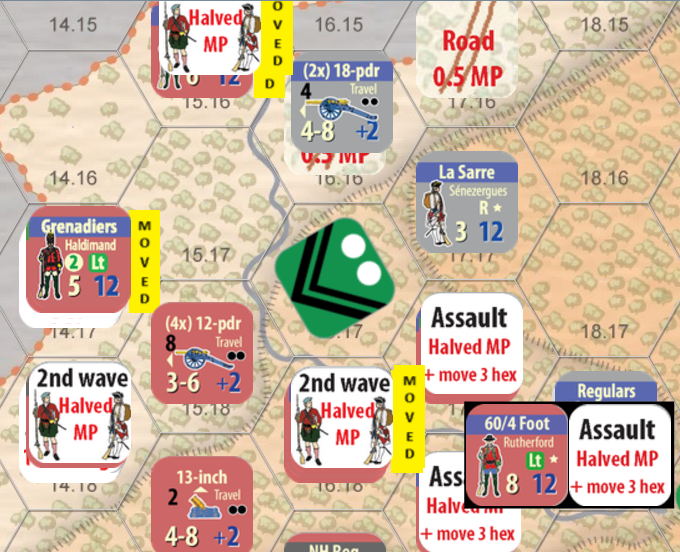
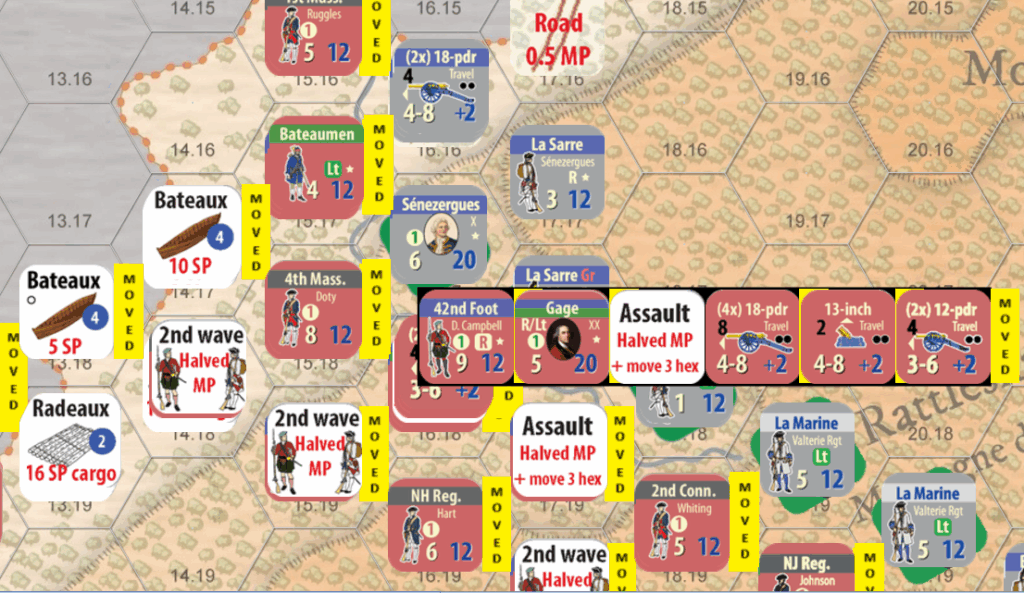
Assault
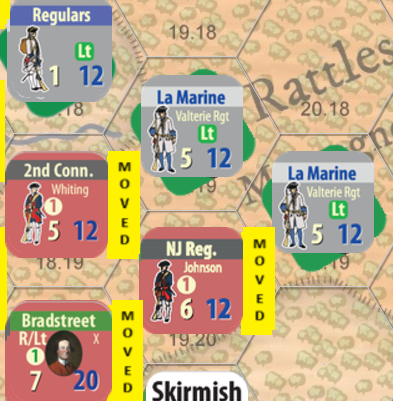
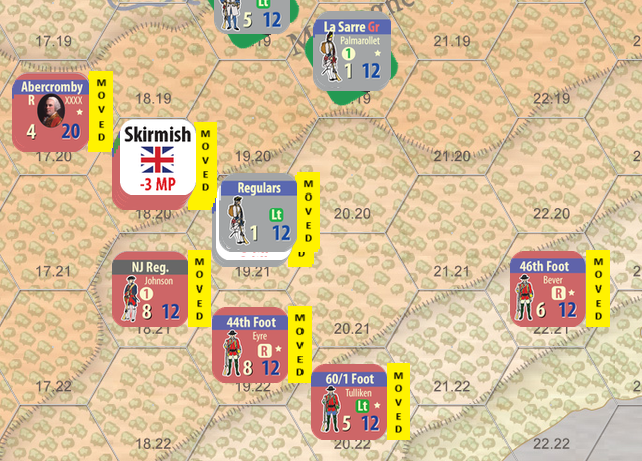
I decided to storm the French hill position on Mont Agne (or whatever it was called at the time) with my one committed British assault. I assigned the replacement leader to the mandatory regulars-only stack, but kept Gage in the background to lead the assault.
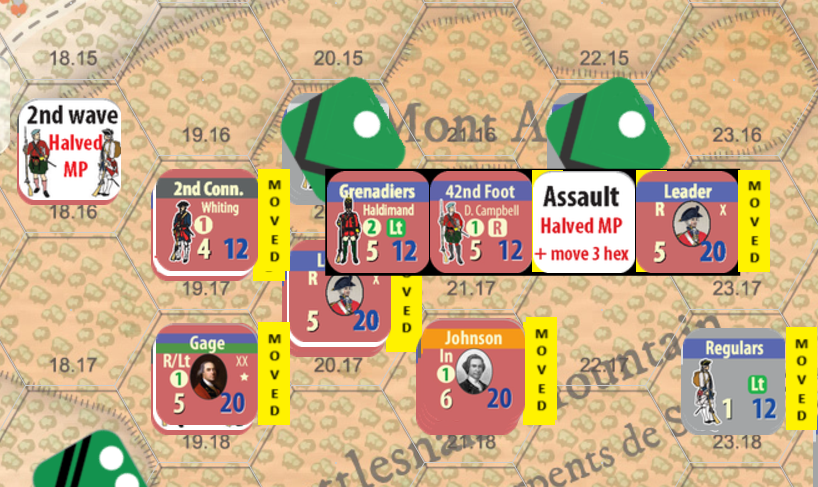
Let’s do the math:
– Two assaulting stacks: one with 10 SP, another with 8 SP
– Provincials are halved in assaults
– 5 SP defending
This gives 3:1 odds (I aimed for 4:1 but didn’t have enough regulars available). The breastworks reduce this to 2:1. These odds apply to both attacking stacks, which are resolved separately. Essentially, both attacking stack utilize the better odds, but only the one of them (the “main” regular infantry stack) is included in the combat results. The second stack will roll for own casualties only.
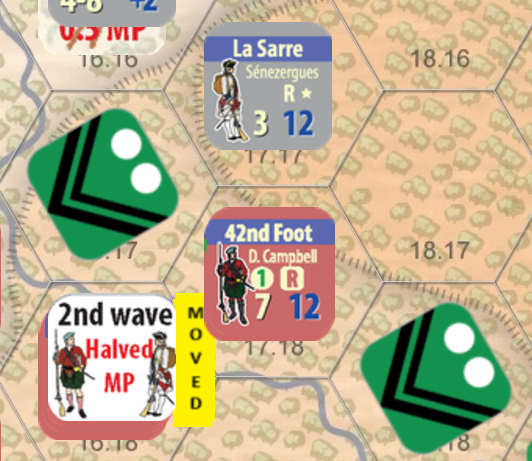
The lead assault group (the one with the regular leader) attacks first:
– Uphill: –1 DRM
– Haldimand’s grenadiers: +2 DRM
– Gage: +1 DRM (the assault leader himself has no bonus, but Gage is within range and provides his modifier)
Total modifier: +2 DRM, as the defending stack has no modifiers.
This is the decisive roll for the entire assault.
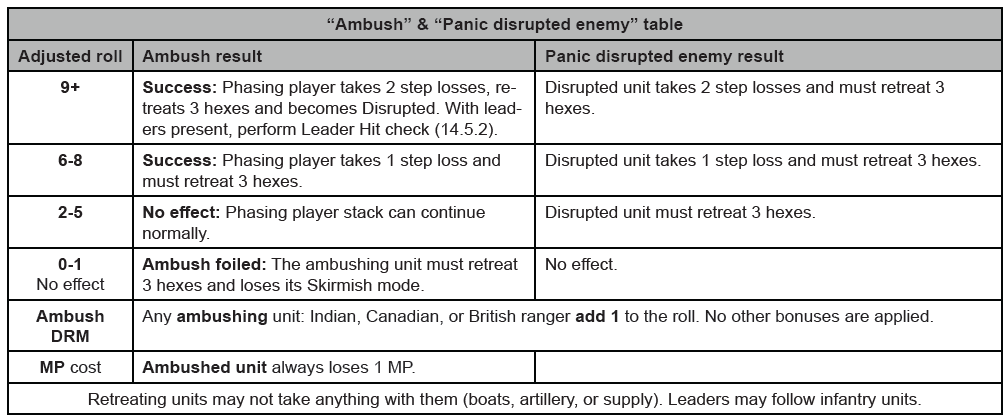
The die roll was 3, modified to 5 — a narrow success.
The second stack rolls only for its own losses; the defender’s result is ignored. The roll was 1, modified to 3, resulting in one step loss, which I allocated to the provincial regiment.
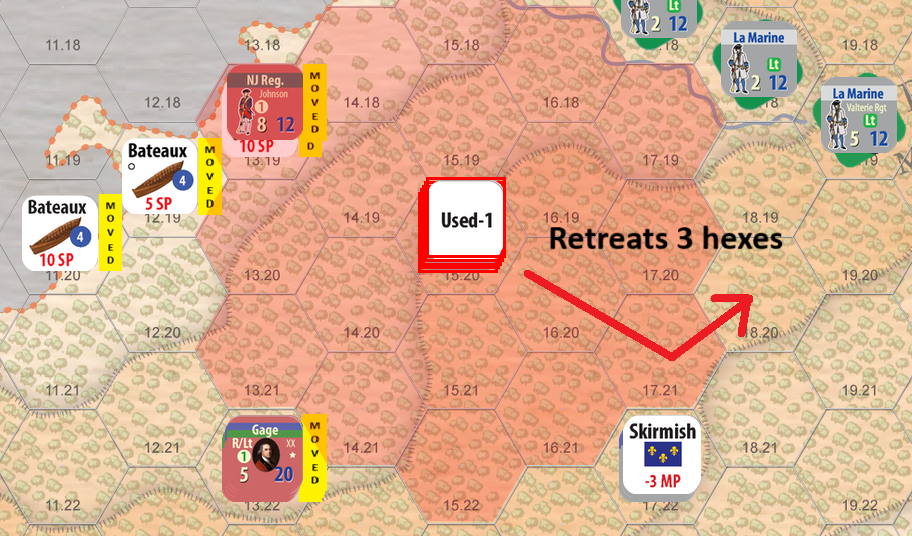
The final action occurred by the lake. Regulars and provincials attacked a reinforced French stack at 3:2 odds with a –1 DRM. This did not go well for the British. They suffered one step loss — again assigned to the provincials. The stack retreated and became disrupted.
This concludes the combat phase. No adjacent hostile units remain..
Of course, I realized afterward that I had forgotten to use my British Light Artillery. In an effort to streamline play, I replaced on-map artillery counters with off-map markers that provide a +1 DRM in offense (–1 in defense). I simply forgot to apply the modifier.
Finally, I conducted end-of-segment cleanup: removing disruption markers (for both sides), clearing Used and Assaulted counters, and resetting the board for the next phase.