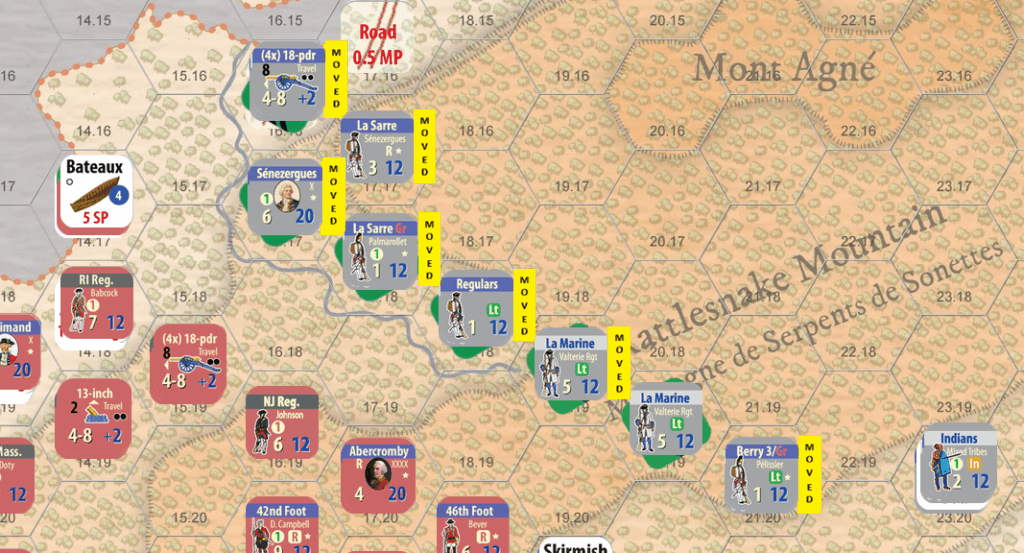
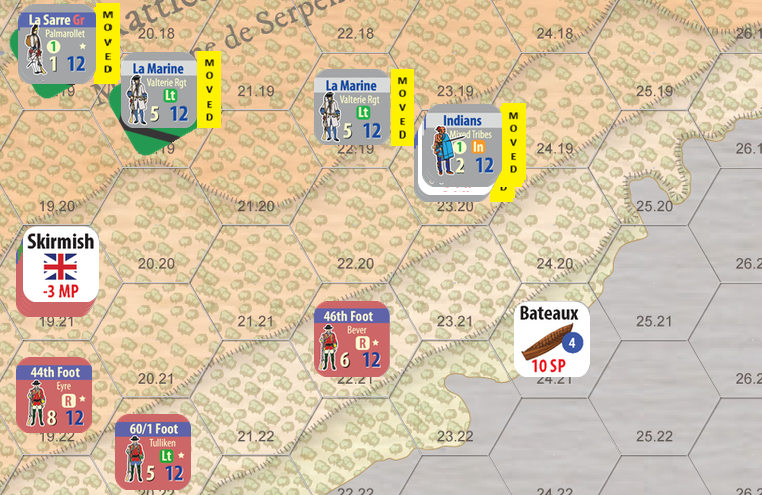
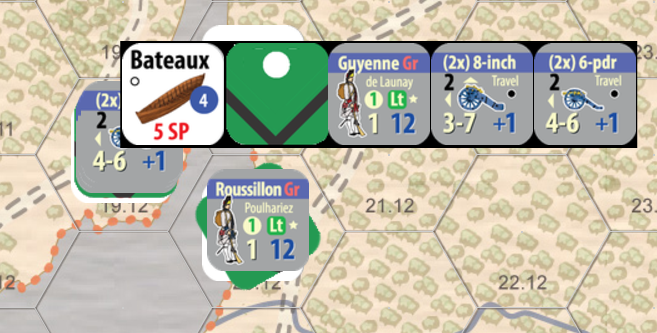
As the sun rises for the big day (in this scenario), the French leaders discuss if their defenses are strong enough. They are confident the combined army of New France is able to stop and push back the red coats along with the provincial regiments crowding in front of them.
The French prepare for battle
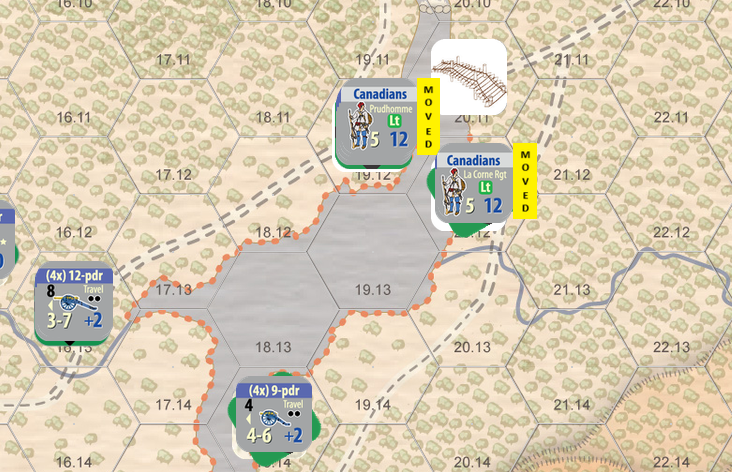
A batch of 500 Canadian militia lands in the morning and they are sent forward to beef up the French left. They arrive just in time to see a huge number of enemy troops approaching.
Other French troops are shifted to better positions to eliminate weak spots. If the British break through, they’ll have to fight their way in to defenders’ rear. And that will not be easy and requires bringing the heavy artillery forward.
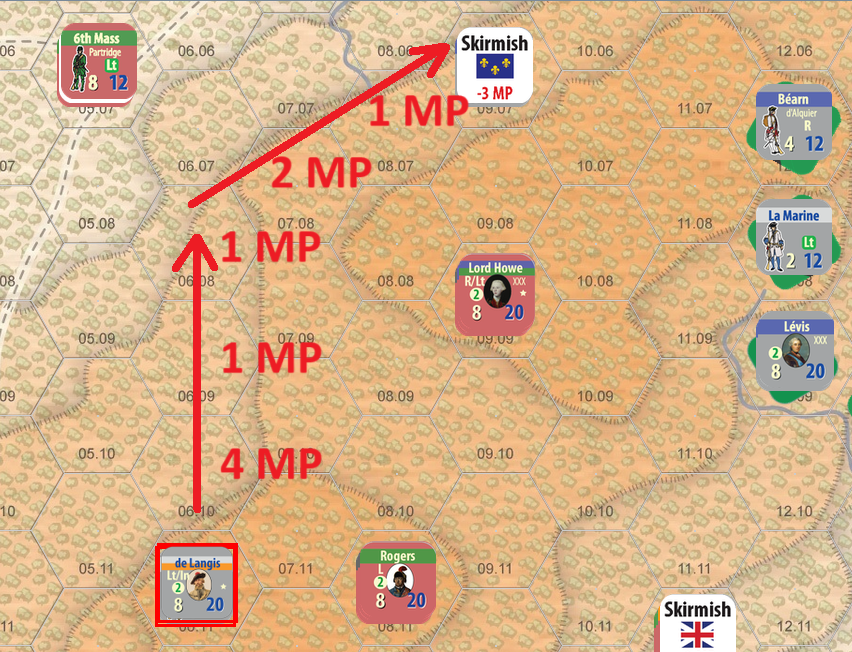
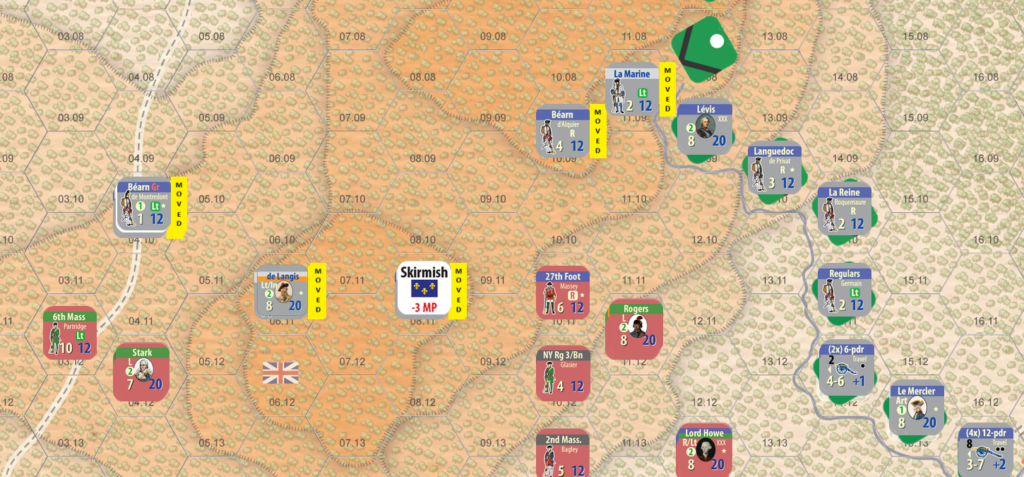
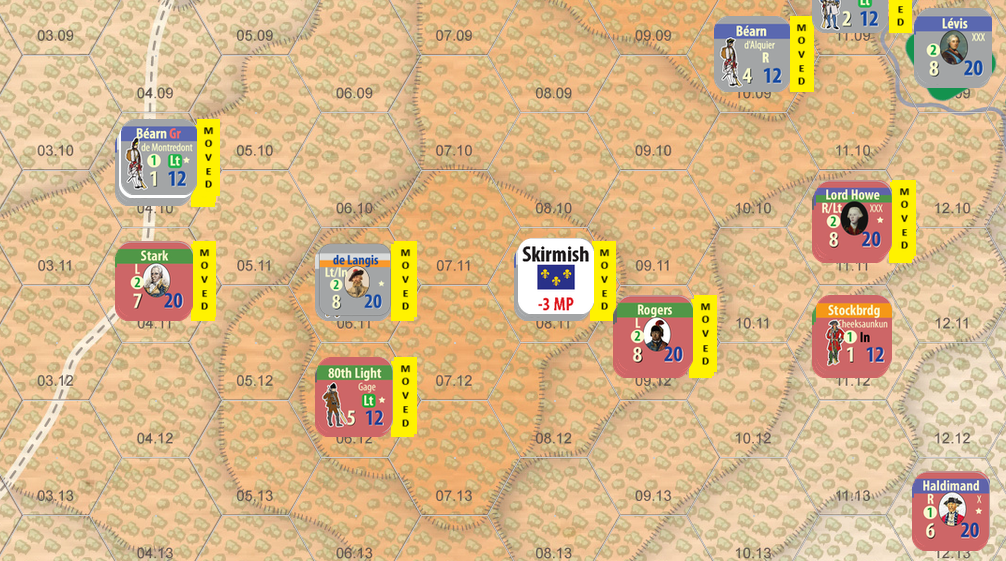
De Langis with his blocking force sneaks back through a gap left by the enemy vanguard and is able to get back to friendly forces. 12 movement points is just enough even in this tough terrain. No need to use Forced March which would lower their fighting ability. Crossing a steep slope takes time, but the rest of the journey was mostly along the side of the mountain. The distance is not great, but this is difficult terrain and I have slowed down the game over time – there was too much mobility in earlier versions.
This concludes the French Movement Action Segment and we get to the British movement next as they prepare the troops for the big day.
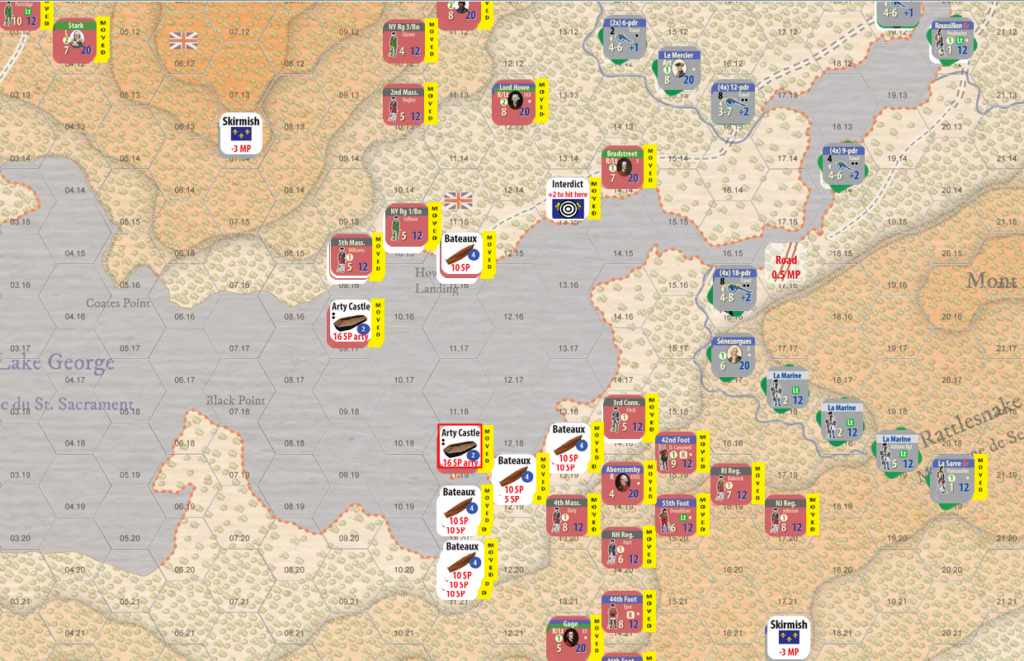
First, two Artillery Castles move into action one by one. As the first one nears the narrows where the French positions are located, some heavy 18-pounder cannons start blasting at this “armored” vessel. This time they miss completely by rolling a zero. Even the available modifier does not help – a zero is a zero. The British vessel continues advancing into the nook – the other French artillery remains silent as they are waiting the first vessel to continue their journey even deeper. The British artillery captain Ord decides not to push his luck and opens fire against the French fortification at point blank range.
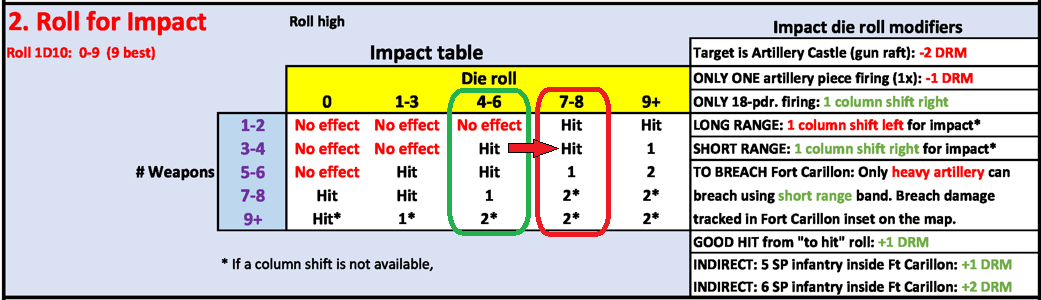
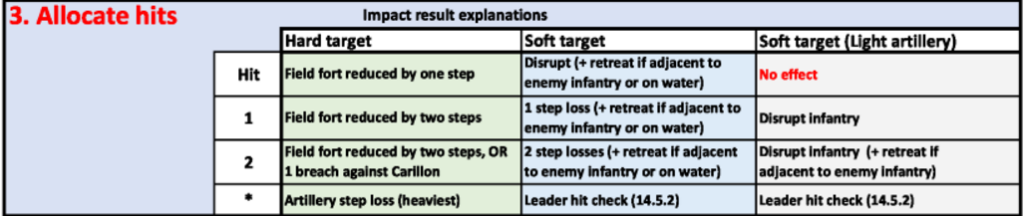
With four howitzers and two guns onboard, they succeed gaining a hit. We still have to test for potential damage, so another roll is required. They do not miss and inflict massive damage on the earthworks destroying them completely. A shift right with the short range helped to achieve this. The artillery also takes a step loss reducing the 18-pounders to two pieces. This was a significant achievement, especially as the British ground troops hadn’t started their advance yet. A hole is opened in the French lines!
Artillery losses are not counted in the game – they just lessen the capabilities of the side suffering the loss. The second Artillery Castle also moves forward and in turn is interdicted by the two remaining heavy cannons, but without causing any damage. This time the two other batteries do not wait for a deep excursion and open fire at three hexes range even if it is beyond optimal (which for them is either one or two hexes). They score a hit forcing the vessel to retreat – no other damage was suffered.
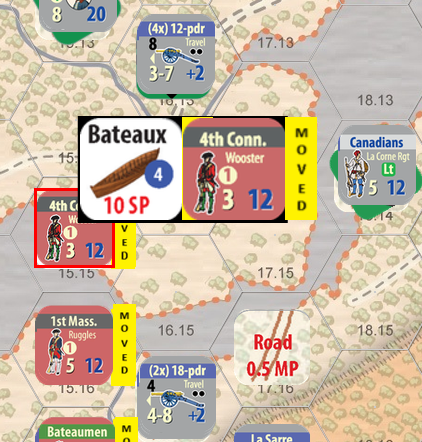
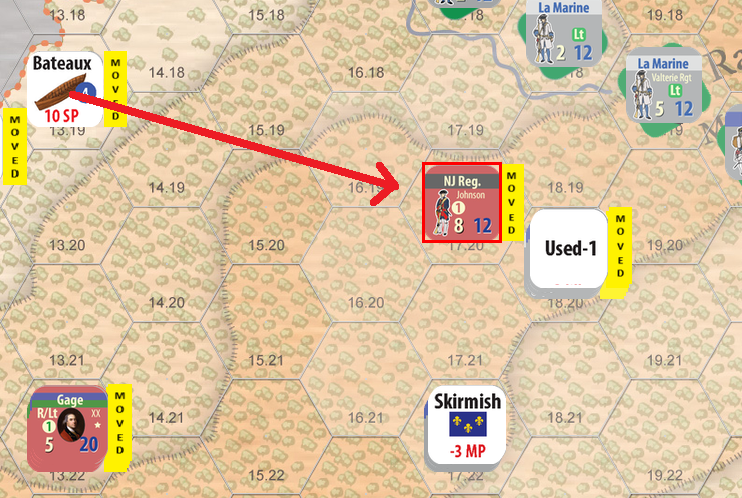
Besides moving a lot of British troops and artillery for the assault, I also try to sneak a small Provincial unit through the artillery gauntlet. It’s unlikely they’ll make it, but let’s try!
Cannons anchoring the French left take a shot and hit the bateaux. This Connecticut regiment ends up taking a step loss becoming disrupted and falls back to the departure area.
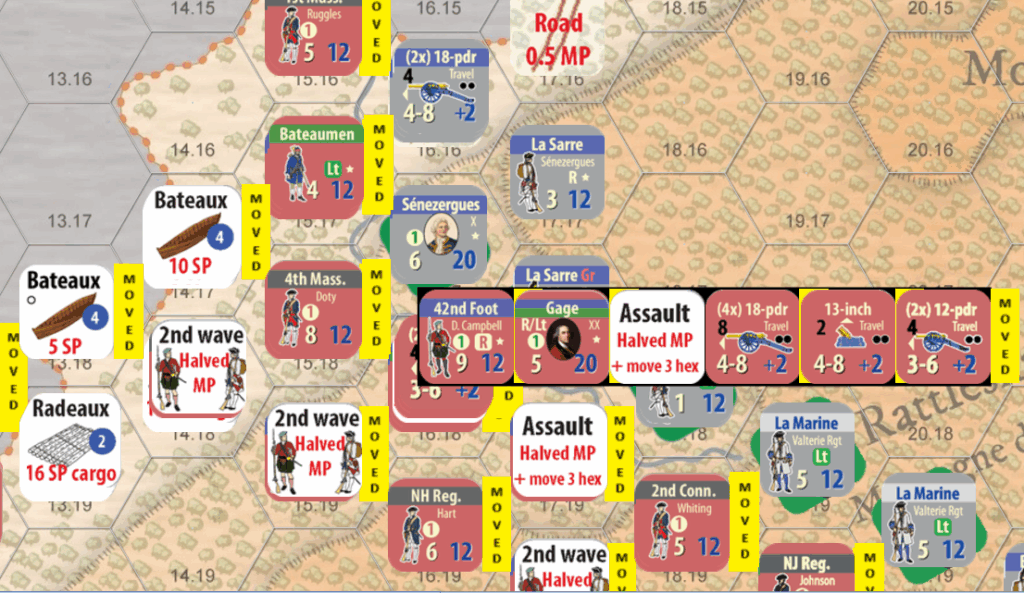
I decided to not only try to breach the hex where fortification was destroyed, but also another one in the middle of the French line – this is where the assault is now planned. I put two of the strongest British regular units into Assault Mode and moved forward pretty much half the Brutish army.
There were mostly provincials close to the shoreline, so they would have to attack separately. My regular infantry was too far away to be prepared for an assault there – after all, I hadn’t expected to be able to attempt a breakthrough there.
The British troops had been split and this complicates the planning. I had some of my best commanders on the wrong side of the lake, but I take that as they are now in reserve in case I do need to renew my attacks later. There will be heavy casualties, just like in the real battle, when going against a fortified position. I was able to move some units across the lake to enforce the British assault troops. Additionally, some heavy artillery took too long to drag over to the front to support my attacks this turn. They might be available in the afternoon if we still need them.
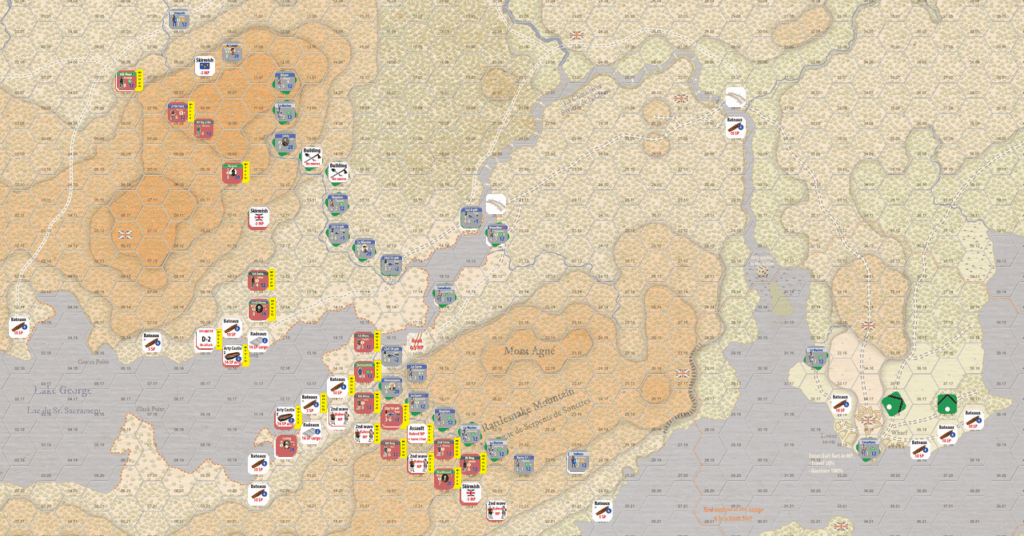
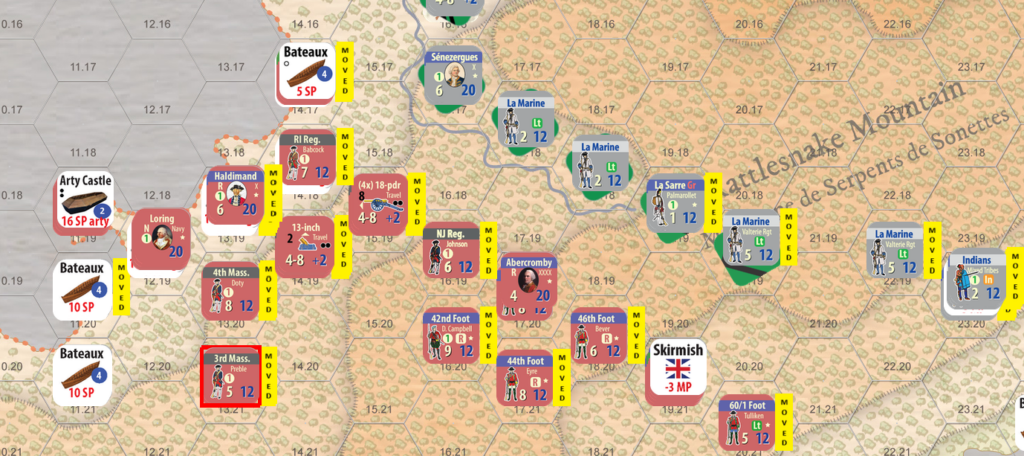
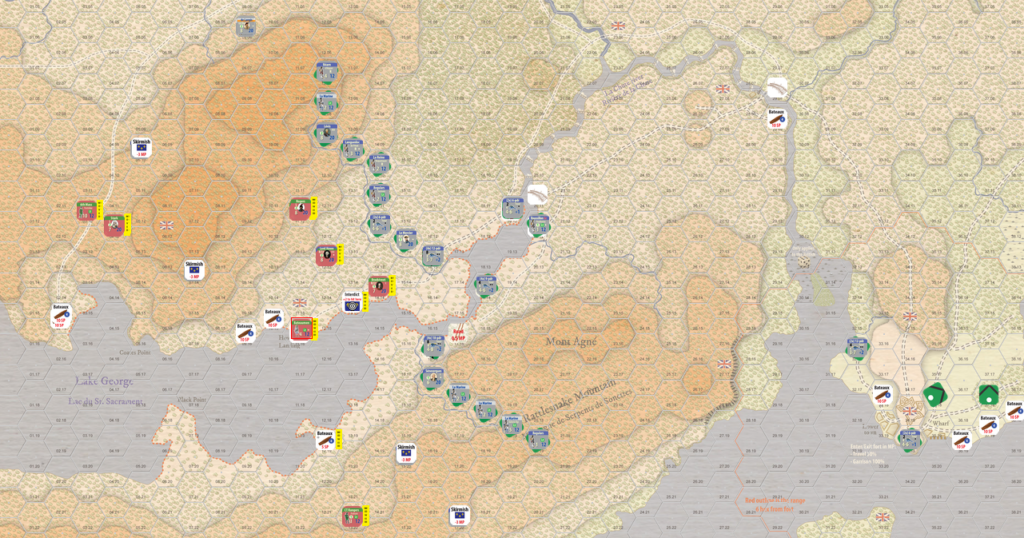
The overall battlefield with a skirmish line on the west side of Lake George (top) and a concentration of the British main army on the eastern side (bottom).
The Battle
Combat consists of one or more “rounds”. The first round is simply all combat after movement is completed – being adjacent to the enemy typically means you must attack. This is the first round. If, after all battles between the forces have been resolved, there are adjacent opposing units resulting from a) advancing or retreating after combat and/or b) reserves, i.e., the 2nd wave units, are brought into action. In this case, adjacent units must now resolve combat. Exceptions to this rule are, for instance, water between the two units (except streams, at least for now) or both sides are entrenched.
I will now start with the British left wing attacking the hex where French entrenchments were destroyed. As I am unable to use the Assault, which actually could have been useful here, I have to make two separate attacks. As most of the units there used water movement, they cannot participate in an assault.
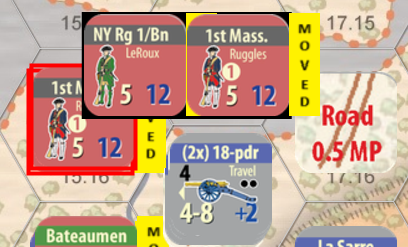
The provincials attack first – DRMs are against them, but never know! -1 for the 1st Mass, -1 for crossing a stream, -1 for Sénezergues leading the French. They get +1 for Haldimand on the adjacent hex. The French decide to save their artillery for the other stack that has the British Grenadier battalion.
And they roll a zero… that is a “challenging” result. They take two step losses + disruption, a morale loss for the whole army, and also a leader hit check.
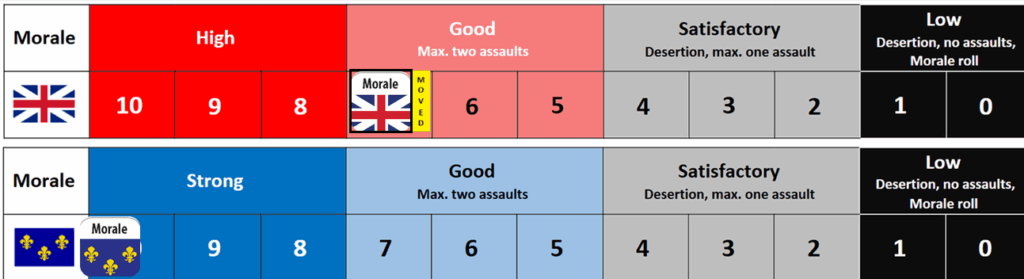
The British morale drops to Good. It’s not that bad really, but going down on the scale is not good news. It’s a race to the bottom and the “winner” loses.
Boom! Haldimand does not pass the leader hit check and is dead. There goes a bonus I was planning to use in the next attack.
Now the French fire their guns against the stronger British stack. Target is of course Grenadiers. Fiedmont – the French artillery officer provides +1 DRM. It’s an 8, modified to 9 – a definite hit. But they only roll a 2 and basically do not hit enough enemies to make a difference.
Another attack follows by the British Grenadiers supported by Bateaumen. No leader support is available as we lost Haldimand, but adding up the DRMs they all cancel each other out. +2 for Grenadiers against -1 for stream and -1 for busybody Sénezergues.
The odds are 2:1 and the roll was an 8 (not too bad, really!). No casualties on either side, but the French have to retreat and their cannons are captured by the British.
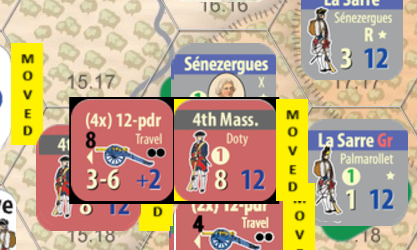
My sacrificial lamb is the 4th Mass who has to attack the well-entrenched Berry Regiment’s 2nd Battalion so they cannot support any of the surrounding engagements. The Mass troops have to attack across the stream, uphill, against a redoubt led by one of the best commanders in the French army. The raw odds are 2:1 but there will be three column shifts against… final odds are 2:3 and DRMs are -3. Looking bad!
Rolled a 3. With -3 it becomes a zero and we get yet another -2DM* result. Two step losses, a morale loss and a leader loss check. The brave Massachusetts regiment loses half of its strength (both of their step losses were actually 2 SPs),
I will have to continue this in the next post – soon!
Writing this post was delayed as I got involved in another game project and did some OOB research for it. Also, some of the Vassal module updates wiped out many counters from the save file. I lost e.g., all casualties, so had to rebuild the losses table based on the previous posts. It should be close enough to continue.
In the Maintenance Segment of the Morning Action Phase, during the “council of war”, the player(s) may commit to one of more assaults. These are coordinated attacks from two hexes against one. Committing to one immediately costs one Morale point which you’ll gain back double if the assaulted hex is captured by the end of the phase. There is no need to decide which hexes will be assaulted at this time. Because today is a big day, my British will commit to two assaults and thus it costs two points of Morale. Before that I rolled for improving the morale – now only for the British, because the French morale was at max. Later in the game, this could have some significance as the number of available assaults also depends on the level of morale.
The British supreme commander, Abercromby, has a leader rating of 4 (scale 1-9). I have to roll this or lower to improve the morale. This way, leaders with a high rating have a good probability to increase army morale. I rolled a 7, so no change. Abercromby really wasn’t the heart of the army, was he?
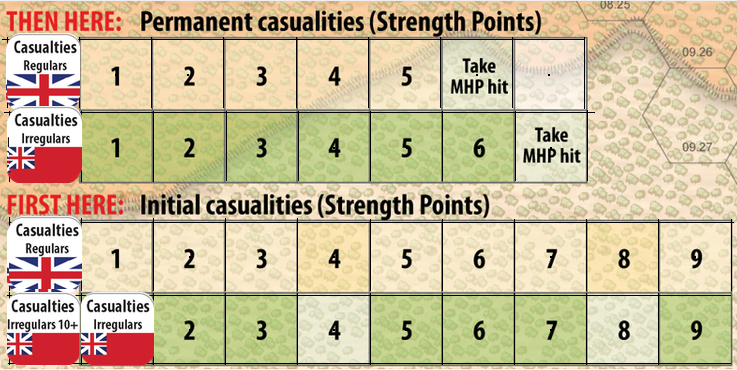
Any replacements are also received during the Maintenance Segment. These are previously taken casualties that trickle back to the units. For every 4 SPs lost of either regular or irregular type, one of that type comes back. I’ll just add 1 SP to one of the provincials. The remaining three SP go into the permanent losses area, where they will lower the morale by one for every 6 SP lost.
Other things I have to are to remove the Interdict markers and land some British supply. The latter does not play a significant part in the game and might feel redundant, but it did play a major role in any military campaign. In my speed play, I’ll ignore this part – it’s mainly there to tie up some troops to land the barrels of food and munition. There are some other small bonuses, but that is not relevant right now.
This concludes my Maintenance Segment and I move to the Morning next.
At the end of the British afternoon phase, I reduce *all* units’ – both friendly and foe – disruption by one step. It’s a simple way to ensure disrupted units are at the disrupted state once during the opponent’s action segment. There is no rolling for leaders to bring them back – in this game they will self-heal.
At night, all movement is halved. Although it was tempting to create some sort of “getting lost” mechanism, I decided against it. There are enough rules already.
The British regulars and provincials’ combat factors are also halved. What I haven’t still implemented is a first day French combat bonus – it’s a rare missing feature. Mostly I concentrate on removing and streamlining the features. So, the night might provide an opportunity for the French to attack a stack or two.
As the French army is still outnumbered 3:1, they stay quietly in their breastworks and try to beef them up as much as possible. The line will be bypassed, so it might not even face a determined British attack. That we will see in the morning. Only small adjustments are made by moving some more men to both ends of the line.
A bigger boost was gained by the reinforcements arriving during the night, numbering a staggering 1700 men (half of the historical French army at Carillon). It is quite apparent this scenario is very different from what actually happened there in 1758. Who knows what kind of battle would have taken place, had Vaudreuil approved Montcalm’s request to concentrate the army in one place.
The French blocked the British from exploiting a gap on their left by landing some of the reinforcements at the foot of the Montagne de Serpents de Sonettes (Rattlesnake Mountain).
1000 of the reinforcements were taken as far as they could travel at night. Arriving by boat, they could first move up to the waterfalls on La Chute River from where they continued along the rudimentary Portage road. This is a significant force and might ultimately prevent the British from making any significant gains in the area. These units now protect the tip of Lake George, where some French artillery and the pontoon bridge are located.
1000 Canadian reinforcements arrived at night to become the main reserve for the French. From their location, they can move to intercept any incursions into the French rear.
In the morning we’ll see how the British try to deal with this formidable army. In any case, forcing it will be an expensive effort and heavy casualties are something that will hit the morale of the army.
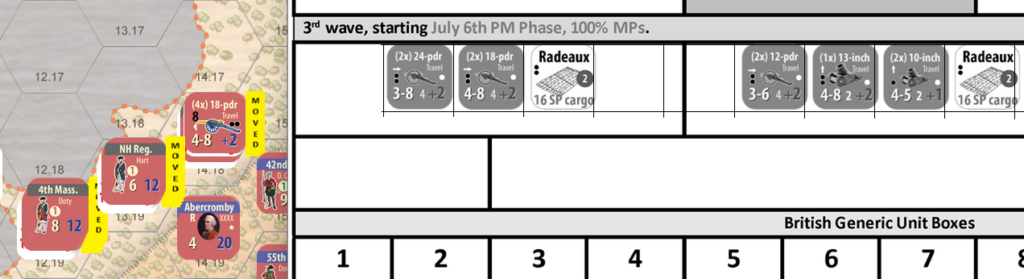
The British army decided to move a lot of the troops that had landed on the western shore across the lake to the eastern side. Some guns and mortars were slowly hauled uphill to support the upcoming assault.
The British army prepares its positions during the night. 7th of July will be a big day.
Some small action ended up with light casualties: 2 SP for the British and the French lost a Grenadier company as they didn’t voluntarily yield to the force of 1000 Massachusetts light infantry…
In the next post, I’ll take a brief look at the Maintenance Phase before we get down to business.
Moving to the second phase, afternoon, the French decide to take no aggressive action. The British have split their forces and this could be a golden opportunity to hit them hard. However, looking at the strong enemy forces facing the French, perhaps it is just better to wait behind the earthworks and see what the enemy plan is. The French only strengthen their patrols to delay any British advance and also enforce the two artillery batteries protecting the fort with 2 SP Canadians each.
We move now to the British Action Segment on the afternoon and its going to be a busy one. They can’t make any assaults (i.e., two stacks attacking a single hex), as those need to be preplanned in the Maintenance Segment and there hasn’t been one yet.
So, as the British, what shall we do? We had landed the main army on the bottom part of the map (east), but have quite a few irregular troops and key leaders on the opposite shore. The day is fading fast, so we won’t have a lot of combat coming up – more positioning the troops for a push in the morning. There is no point trying to force the French line before sufficient forces are available. Obviously, this scenario is very different from the historical one.
The first thing to do is to land that artillery as it will take some time to get them off the rafts* and start hauling towards the enemy. Everything is now in place, both the rafts with the artillery and the men required to unload. However, I can only commence the work during the night Action Phase which follows the afternoon.
* The players must commit troops to haul artillery around. Loading or unloading arty requires a lot of manpower. The large cannons and mortars weighted several tons each and they surely don’t just hop ashore by themselves! The “road”, i.e., the portage, was not really a road, but a soft and muddy path after the heavy rains in early summer of 1758.
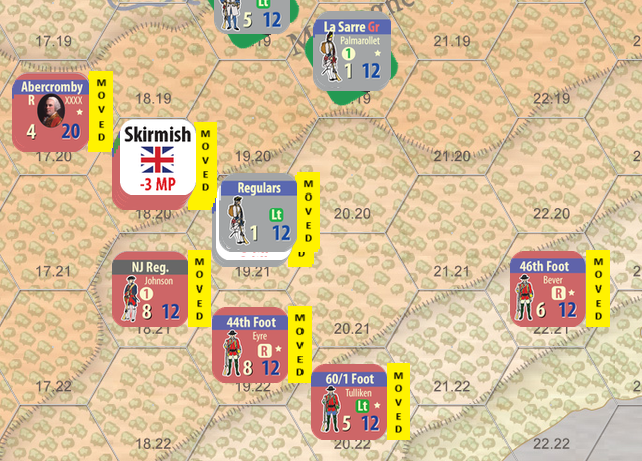
Next, I put some light infantry into Skirmish mode and engage the French skirmishers. They cannot ambush now as the two opposing skirmishers “cancel each other out” and decide to stand and fight. Covered by a ZoC I am able to move additional units there so I can hit them at least twice (which is the normal maximum of attacks per hex). More attacks can only take place if e.g., a unit must retreat next to it (and is thus mandated to attack).
The remainder of the segment is just moving the British into better positions.
The British engage the French forward patrols
We’ll have a handful of engagements in this segment – namely trying to push the French skirmishers back.
Let’s start with Stark and the 10th Mass. light regiment (10 SP – ~1000 men) on the left engaging 300 Indians and Grenadiers. Ten against three is 3:1 and Stark provides +2 DRM while the opposition has -1 DRM for this skirmish – net +1 DRM. I rolled a “5” and with the DRM, it ends up being a “NE / R” result, i.e., the attacker has no effect and the defender has to retreat (three hexes). The French group simply retreats along the path to continue being a road block.
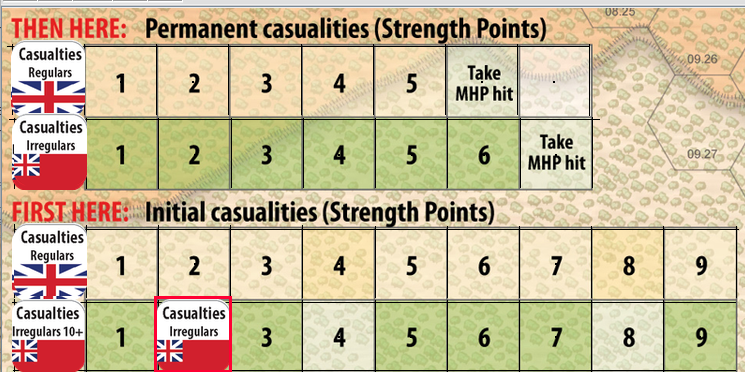
Next, we have 5 SP (-1) provincials with 5 SP 80th Light Infantry going against 4 SP Canadians, but de Langis (“Langy”) is a great leader and gives, in this situation, -2 DRM for the engagement. And it’s another “5” than turns into a “2” because of -2 DRM from the French leader and -1 from the provincials. The result is a “-1D* / NE” meaning the British units take one step loss. I will allocate this to the provincials, because there is no positive DRM provided by any unit allowing me to choose who takes it. In this case, the step loss is just 1 SP (with larger units, it can also be 2 SP). They will be Disrupted and must retreat three hexes. There was no leader on the attacker’s side, thus the asterisk is ignored (leader hit check). Once I moved the counters back, I reduced the provincial regiment by one step and added that 1 SP to the Initial casualties track (the irregulars’ initial casualties are now 2 SP). In the game, it is important to separate step losses and SPs lost – they do not go hand in hand.
Moving to the third skirmish where we have 9 SP provincials attacking uphill against 2 SP (an Indian and a regular unit). This time Rogers is leading and thus provides a significant boost to the attackers (+2 DRM), going uphill negates part of that (-1) and also the Indian unit has a bonus (+1): the net is no DRMs for either side. These provincials do not have any negative modifiers (a NY and a Mass regiment).
Now I roll a “6” and this makes it a “NE / -1” – defender loses, takes a step loss and must retreat those three hexes. 1 SP Indian unit is destroyed (they provided a positive DRM for the defender and must take the first step loss) and I’d say that is a grave loss for the French. The Indians carry more than their weight in SP – they have some special abilities.
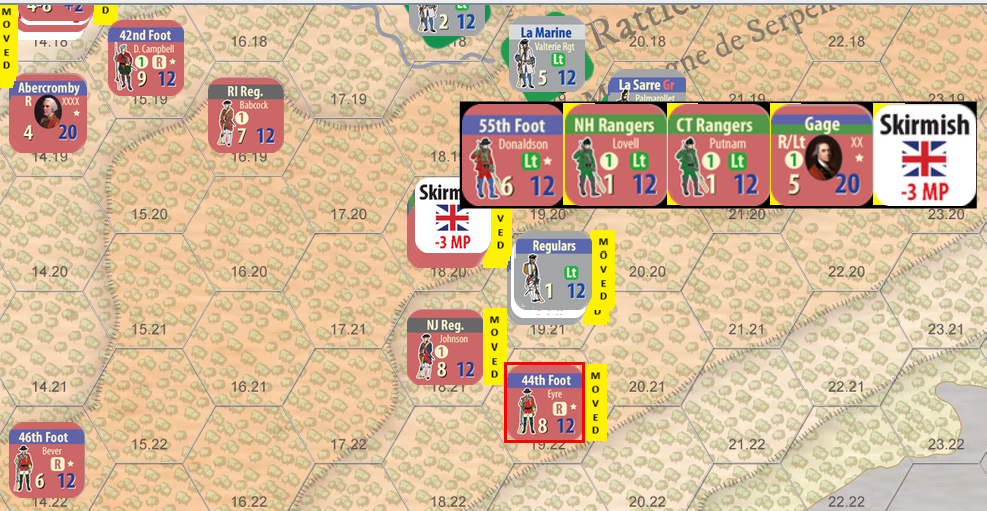
The last battle in this Action Segment is on the eastern side of the lake where I have three British stacks each at 8 SP adjacent to the French stack with 4 SP. I can make up to two attacks against a single hex, so let’s start with the NJ Regiment (-1) to soften up the defenders. Although there is no British leader stacked, Gage is on the adjacent stack and will provide a +1 DRM to negate the -1 of the provincials (leaders have a one hex radius). The French have no modifiers (the grenadiers are from the Berry Regiment which was untried and had little combat experience).
This time, I roll a “4” and with 2:1 odds it means the attack fails and the provincials lose 1 step and must retreat (and I spotted an error in my table!!!). As the NJ Regiment was a large one with 8 SP, one step loss is actually 2 SP which I will add to the Initial losses. With 4 irregular SPs lost, 1 SP is eligible to return to combat in the next Maintenance Segment.
The second attack against the same hex is by the 55th Regiment of Foot accompanied by two Ranger companies (NH and CT). The whole group is lead by Gage who goes into his 2nd attack of the afternoon. The French have no bonuses and the British get a +1 DRM from Gage. The odds are the same 2:1. Attacking downhill has no effect one way or the other.
I roll a “4” (all rolls within Vassal have been now between 4 and 6!). Add +1 DRM and it is a “5” – although the Rangers do have a bonus, they are not at least 50% of the SPs attacking and thus do not carry enough weight in the battle.
The result forces the French to retreat. The victorious British advance one hex.
One thing I apparently forgot is to bring back the units that had retreated off-map earlier. As I write this in small chunks I overlook a thing or two (I am on vacation!). I’ll fix that now and land those troops along the shores. This basically concludes the daylight segments of the first day and night will follow with the subsequent Maintenance Segment.
I will continue the game in the next post in about a week or so.
In the previous post, I did not complete the first British turn fully – the landing of the main army was only getting started.
One Massachusetts regiment was ambushed after landing and retreated off-map. But the British now follow-up with another regiment landing in the same place – they now know there are French around and cannot be ambushed by the same unit again. If there was another unit in Skirmish mode, that could attempt the ambush, but it’s too far away.
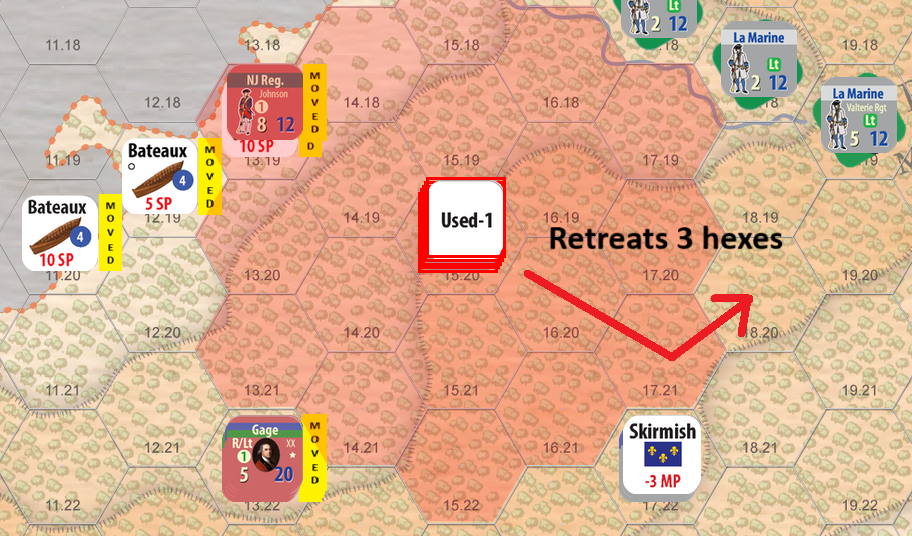
The New Jersey Regiment lands into the ZoC of the French patrol which decides to pull back three hexes. This is the other special ability you have in Skirmish mode.
However, the NJ being aggressive, they start moving inland and follow the retreating French who still feel they don’t want to engage in combat.
The French take their second (and last) retreat option and pull back again, now all they back into the friendly fortifications where they lose the Skirmish mode automatically (due to stopping at a fortification).
I am landing the irregulars before most of the line infantry to ensure my strongest units can land uninterrupted. I want to save them for later engagements and not be delayed on the initial stage of the operation.
Finally, the whole army is on the shores of the lake. It is divided into two parts and really isn’t in any type of optimal situation. My idea is to tie up enough French on the western side (top part of the map) and hit hard on the opposing side.
The two Artillery Castles are still held back outside the effective range of the French cannons. Technically, they could have fired, but I didn’t bother now to speed up the game.
What will likely happen next is a French counter-attack against the weaker British on the western side… but that’s on my next post.
In this series of posts I will walkthrough several turns of the game play step by step using the rudimentary Vassal module I have been working on for the past several months. This will hopefully help players get acquainted with the mechanics of the 1758 Fort Carillon game. The module and art used are very much work in progress and are visibly incorrect in many ways. I will try to highlight those as I go through the game.
There will be inconsistencies in and between various images – this is a living project where many details are still being adjusted.
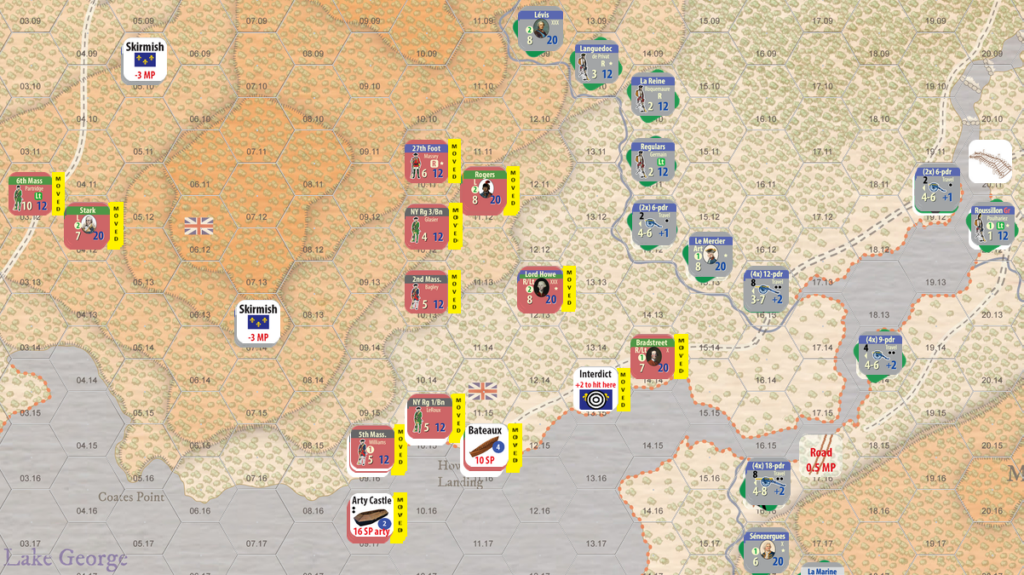
The starting setup in the “Montcalm’s Plan” scenario. The French are deployed into a defensive line with artillery close to the lake on both shores. Most units are also entrenched.
French setup
The French player has 40 build points that can be used to prepare defenses on the map. I have prepared a version that has a setup for an easy play. It can also be altered, if the players so agree. However, the 40 points are the cap and all constructions must be within that limit. I will not make any changes here and just go ahead with my saved scenario.
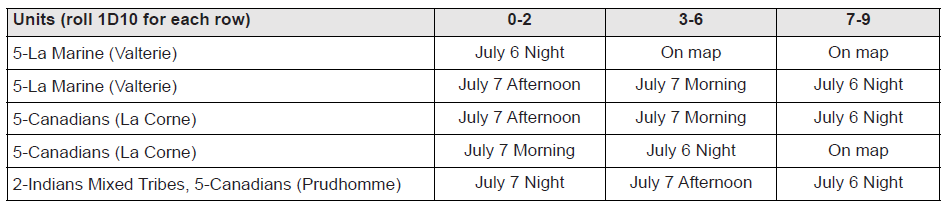
Part of the setup is the random French reinforcements. As “Montcalm’s Plan” covers the release of various troops to defend Carillon sooner than historically, let’s see when the remainder of those forces will arrive based on some die rolls.
The table for random French reinforcements.
I rolled five times: 5, 7, 5, 5, and 8. So, the troops will arrive by bateaux as follows:
5 SP La Marine starts on the map (SP = Strength Point, approx. 100 men)
5 SP La Marine will arrive on July 6 night
5 SP Canadians on July 7 morning
5 SP Canadians on July 6 night
2 SP Indians and 5 SP Canadians on July 6 night
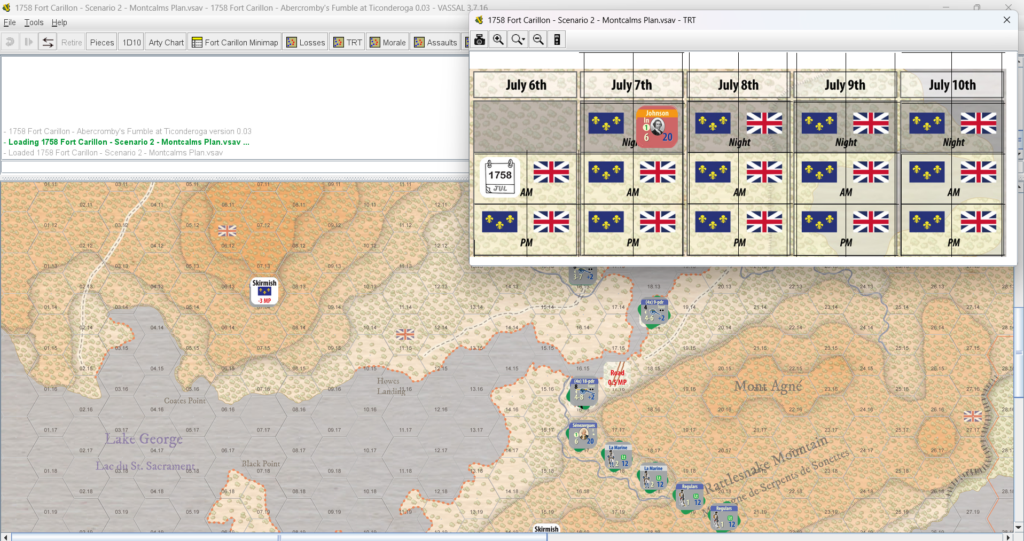
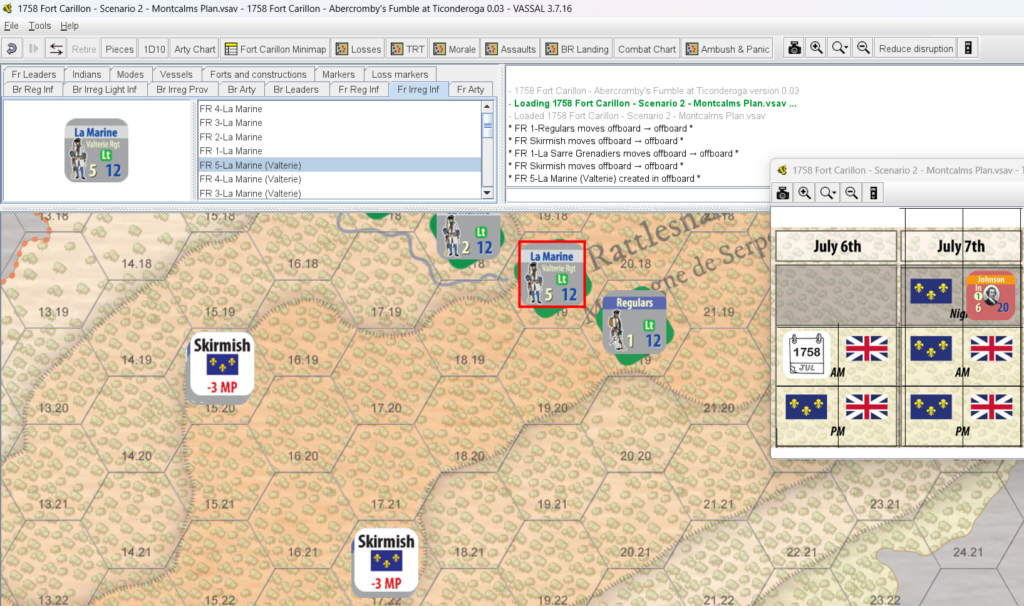
Next, I will find and place those units on the TRT (Turn Record Tracker) or as I still tend to call it, the Date and Time Track. As I received a strong 5 SP La Marine unit directly on the map, I decided to beef up my southern flank to discourage any British incursion there. This freed up some smaller 1 SP units from the entrenchments that I placed forward to support the skirmish line.
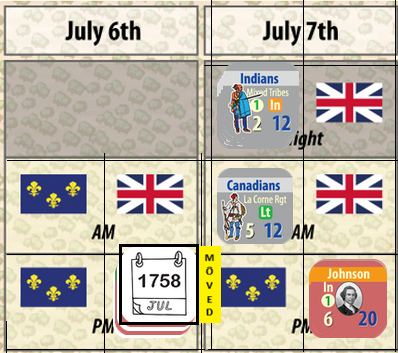
500 marines had arrived in time to join the troops on the French left flank.(The arrival of Johnson’s Indians is incorrect here.)
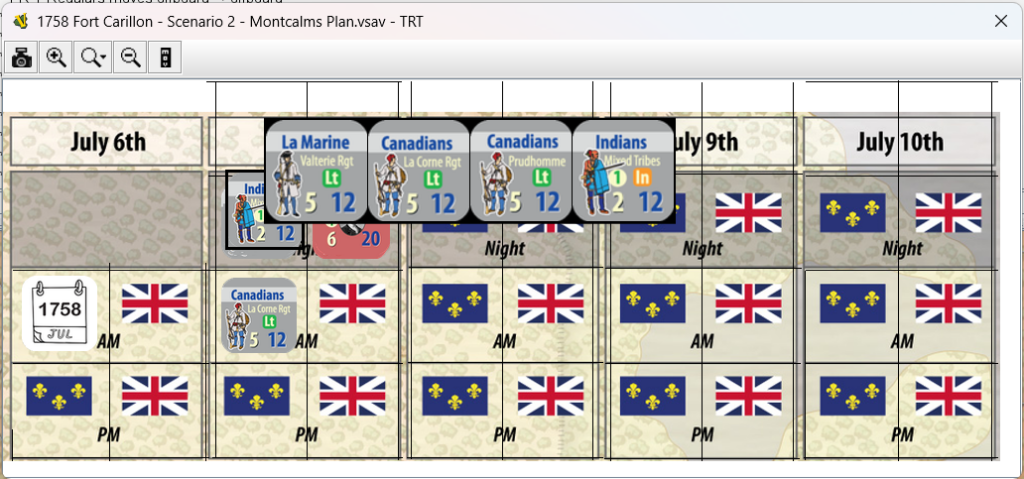
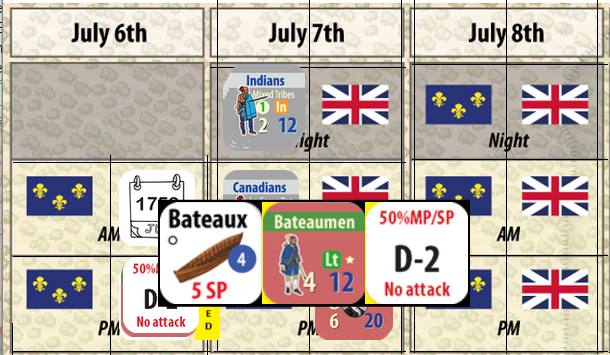
“July 6th night” is still on my version of the map under July 7. That will be corrected in the future – the Night Action Segment will move to the end of the previous day. A Maintenance Phase will also be added – it’s already visible in the squares covering the dates. I have not requested updates to the art for quite some time and try to fix most of them in one go.
The French reinforcements are now placed as per the die rolls earlier. Valterie/Valtrie, La Corne, and Prudhomme are just historical chrome and do not affect the game. These counters are interchangeable.
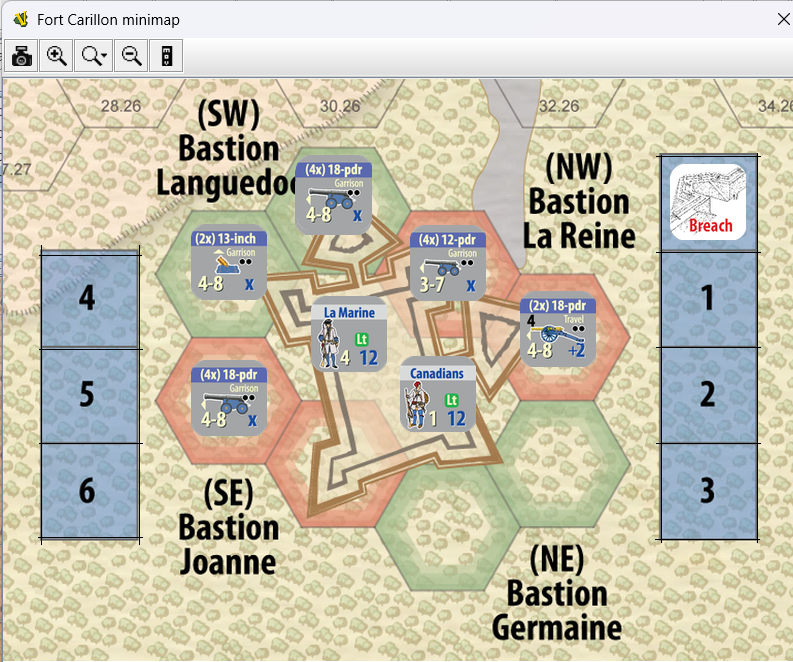
The remaining French artillery is left in the fort along with some irregulars.
At the north end of Lake George, French artillery protects the pontoon bridge. Not a bad idea, as Bradstreet’s bateaumen actually landed just short of the bridge.
The British Landing Commences (July 6th, Morning)
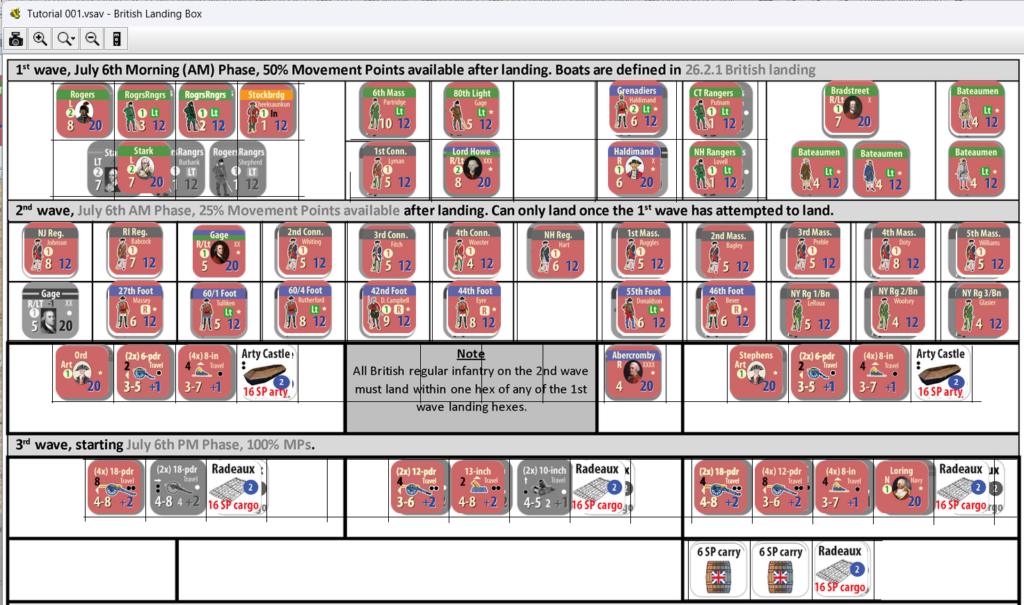
As I make no French movements on the first turn, I will now begin the British landing. It is divided into three separate waves; the first two take place on the July 6 Morning Action Segment. The third can only take place on the Afternoon Action Segment (or later) – this is when the artillery and supplies start to land. After adjusting the TRT, I will open the British Landing Box window and start with the light troops spearheading the main army. Yes, this screen is messy too, but I’ll get it sorted out.
To support the main army, two floating Artillery Castles are available. They may attempt to suppress some of the French artillery or bombard the earthworks.
The first wave with the Grenadiers, Rangers and other light troops are the vanguard of the vast British army. (While this view requires lots of cleaning up, it is good enough for now.)
The French Artillery Interdicts
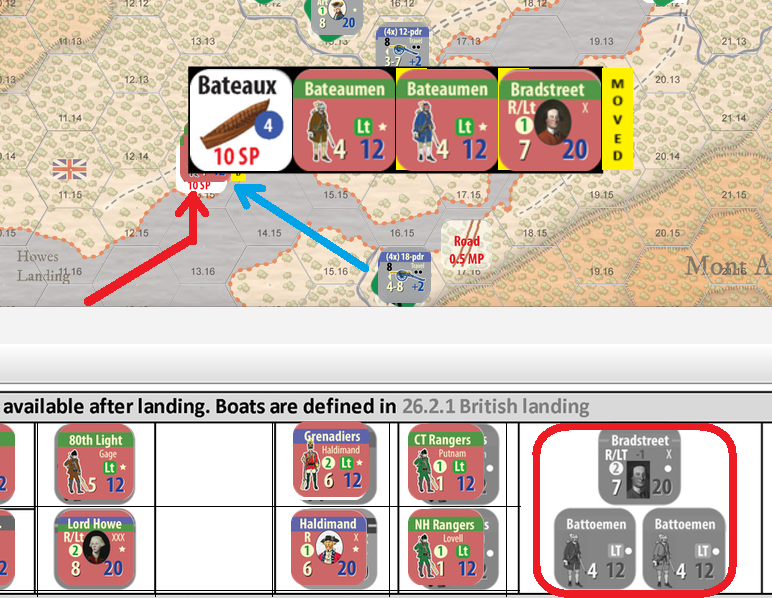
Bradstreet and 800 of his bateaumen are the first to attempt landing. They come in medium range of the French heavy artillery on the opposite side of the lake. An interdiction attempt will take place next.
One of the Bateaumen units is targeted (bateaumen, bateauxmen, battoemen… take your pick! Eventually, I’ll settle with a single term).
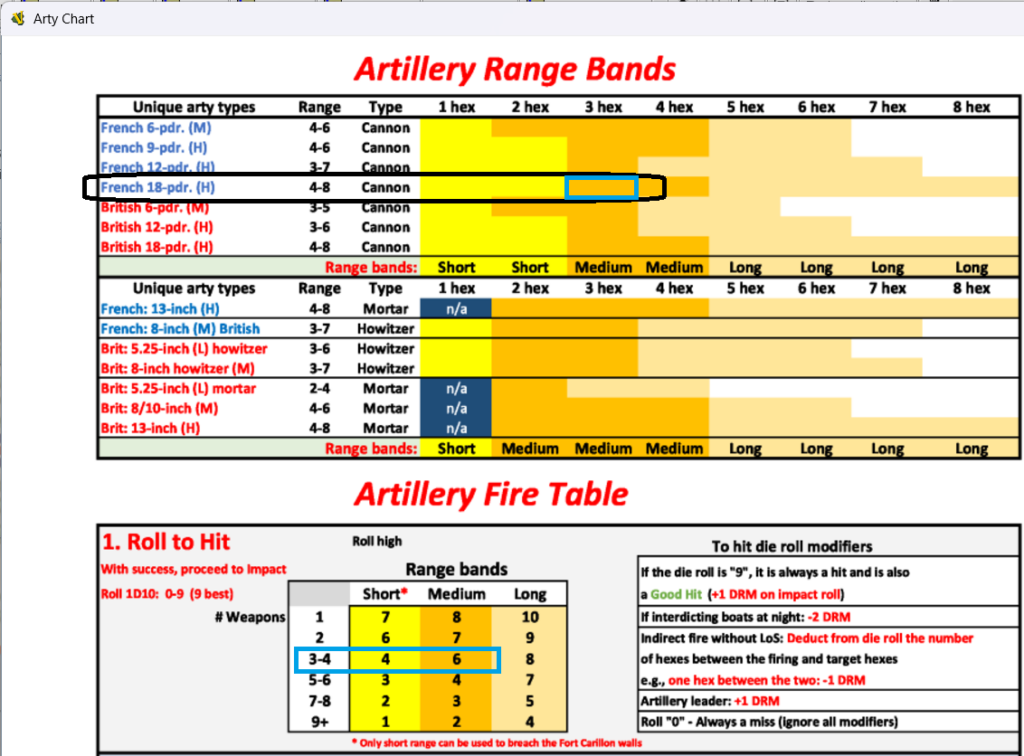
In the Artillery Chart below, we identify the type(s) of artillery first (here only French 18-pdrs) and check the distance: it is three hexes and thus uses the medium range band (orange) which I specifically highlighted with a blue quadrangle. The French also have an artillery leader giving a positive DRM (die roll modifier) for the to hit roll. Should multiple different types of artillery try to fire together, they all must be – in this case – direct-fire capable and also share the same range band (“effectiveness”). They could have a different range, but must be adjacent to each other and also have an artillery leader in range to fire together.
Die roll is “6”, and +1 for the leader DRM, thus the final roll is “7”. Looking at the medium range band for 3-4 pieces on the second table (Artillery Fire Table), it requires at least a “6” to hit (which we have here).
Good, then we’ll roll another time, for any damage. This can also fail completely with a bad roll, but as we have only heavy 18-pound naval cannons firing, we get a column shift right for impact – which is pretty good, because we cannot get a “No effect” on the target. A “No effect” is when you’d score some hits, but not enough to have a real impact within the scale of the game.
The roll is a “4”, and even with the column shift right modifier, the end result is the same on both columns – a “hit”. On the Allocate hits section, we choose the Soft target column, as only fortifications are a Hard target. A “Hit” states that the target unit is disrupted and must retreat as they were on water.
The whole stack is not forced to retreat, only the affected unit. It will not go back to the British Landing Track, but instead, it will be placed on the TRT, to the next British Phase (afternoon). It would normally be marked with a Disrupted (D-2) marker, but as they would have recovered by the time they can re-enter the map, this is not really needed. Recovery from disruption is automatic and will always be reduced by one step at the end of both player’s Action Segment. This is to ensure the unit remains disrupted through one enemy Action Segment – in this case, the unit will miss this segment anyway.
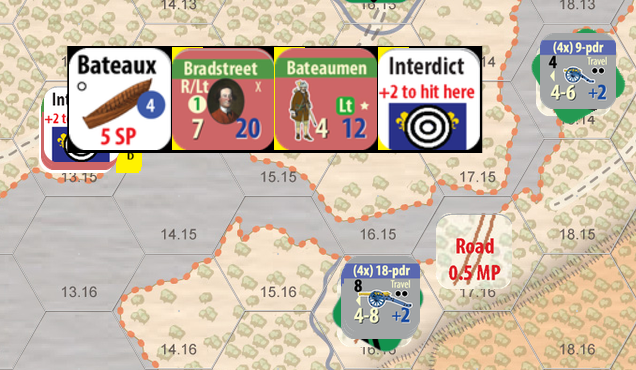
I also split the 10 SP bateaux into two smaller 5 SP counters.
Finally, I place an Interdict marker on the hex, where the British were hit. For any subsequent British attempts, the chances to hit are increased during this morning phase (+2 to hit on the same hex, +1 on all six surrounding hexes). The gunners have now ranged their guns. These will be removed during the Maintenance Phase, because I wanted not to think about artillery being relocated etc. That would have complicated the rules too much.
The remaining 4 SP Bateaumen and Bradstreet are allowed to continue their landing unaffected (they could also have retreated with the other unit).
The 9-pounders seen below cannot interdict as there is land between the water hexes blocking their Line of Sight.
Once landed, the troops have half of their MPs left (6 MP), but they move only one more hex. I will land the remaining British further away to avoid the powerful artillery.
The Vanguard Lands
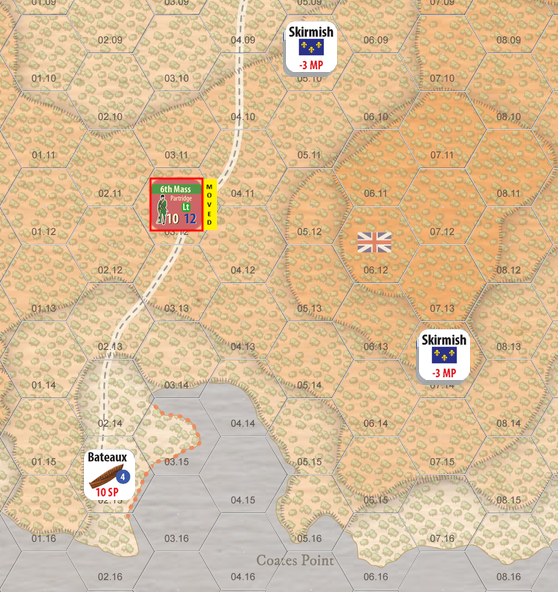
As the next unit to land, I chose the 10 SP strong 6th Massachusetts light infantry regiment. Units cannot use any other mode except normal movement after landing, thus I don’t want them to run blindly against the enemy and keep a distance to the lurking French patrols in Skirmish mode. Had the 6th Mass. moved any closer, it either would have been subject to an ambush or allow any Skirmish mode units to retreat to a more favorable position.
I’ll just go ahead and land more troops.
Below is where I landed my vanguard. The second phase troops, which are the main army, must land within one hex of these landing hexes. “No sane commander would blindly land his army without any reconnaissance,” right?
The Main Army lands
This being a game allows me to explore how different decisions could have affected the outcome. Finding a strong line of defense facing the planned landing area changed, I made the decision to go for the opposite, eastern shore of the lake. Let’s see how this plays out!
There was only one small unit that had come to the shore as part of the first wave, but that should be enough. And if it is not, this operation will fall apart!
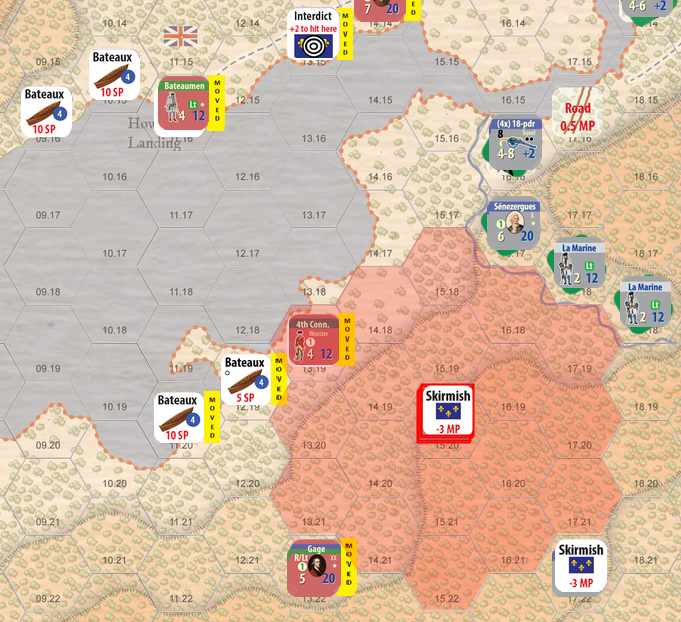
To expand the landing area and accommodate more troops, I had to land on Skirmish ZoC of the French (red shaded area).
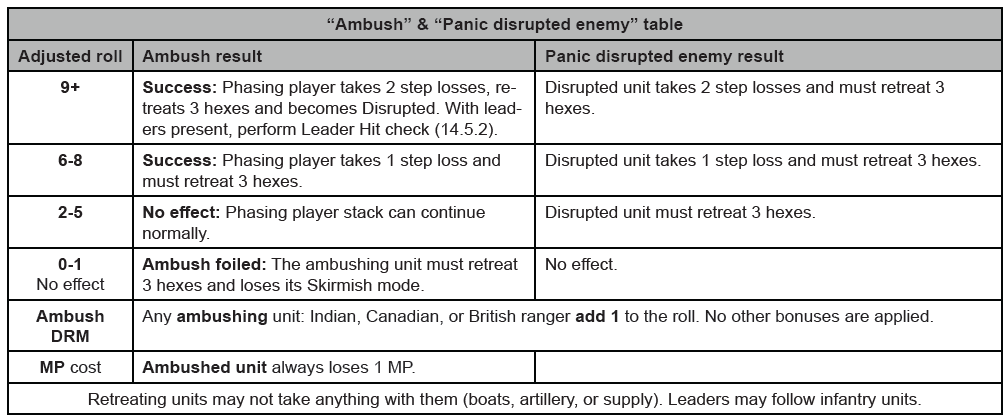
My 4th Connecticut Regiment landed on a hex within the defender’s Skirmish ZoC enabling them to attempt an ambush. Let’s see what happens…
I rolled “8” – the target takes a step loss and has to retreat. As they arrived by boat, they have to retreat by boat into the TRT, the next friendly Phase (afternoon).
Infantry casualties are tracked in two different ways, first they go to either regular or irregular Initial Casualties Track and after four SP losses of the same type, one SP can return as replacements, while the three remaining will go the Permanent Casualties Track. After a certain amount of permanent casualties, Morale takes a hit.
As this post is getting quite long, I have decided to publish whatever I have so far and continue the turn in a future post – hopefully within a week or so. I will also be fixing the language, spelling errors etc. over time.
The battle of Bomarsund was part of the Crimean War, although mostly fought a thousand miles away from the main action in the Black Sea. In 1854, a combined British and French army assaulted and captured the Russian fort in the archipelago between Sweden and Finland. The fort was far from being complete, but it could have been a formidable location had the Russians made a better effort to finish it.
In the so called first battle of Bomarsund, Charles Davis Lucas tossed a grenade overboard just moments before it exploded thus earning the very first (earliest) Victoria Cross.
Finally, after several years of being in the neighborhood (we sail there frequently), I had the chance to visit the site. Not much is left as it was blown to smithereens after the capture. The British and French had no plans to stay through the winter and Sweden did not accept to take over the Åland Islands which had been part of Russia since the Finnish War of 1808-09.
There is a brand new visitor center with a rather small display of the historical events.
It does have some quite interesting maps, drawings and models of the historical fort. Only the red parts had been completed and yellow had been started but not completed. One seventh of all work had been done by the time it was destroyed!
Not many guns, or cannons, are preserved. I assume these are more or less original.
At least they had some Russian stamps on them.
Also, very little of the actual fort is still there – small sections of the walls here and there. But, it was a big fortification with a town (or two) around it. Also, several batteries and towers were built and/or planned around the area.
We also stopped by one of the cemeteries that had been built on the island. Supposedly, the intention was to build a large town in the area and thus the cemetery was very large. Only a small section of it had been used and there was also another one that we did not visit (it had a Jewish and a Muslim section). This one had been prepared for Christians only with separate sections for Roman Catholic, Orthodox and Lutheran deceased.
The Roman Catholic section had a handful of graves of Poles, possible from the time of the Polish Rebellion in 1830s.
Also a number of Russians were buried here – including the four siblings of Kuptchikov – a sobering reminder how well off we are today.
The final land-based field battle of the Great Northern War took place in the small village of Napue, Finland, on February 19, 1714.
I took a day off from work and spend 9 1/2 hours driving there and back to see the field (as my spouse called the trip). Of course, all the museums were closed at the time as the summer season is really short in Finland and they hadn’t opened yet. That didn’t stop me as I’d have likely no other chances this summer to go there.
The modern war memorial erected more than a century ago.It has a sign with roughly the following text: “The Expanses of Ostrobothnia. You can prove that we fought on this field. We did not fall back an inch from the path of duty and patriotism, but we fell in our place to the last man, leaving to future generations a legacy of our obligatory example of standing on the side of the fatherland in hard times, just as we stood on this field and, if necessary, fall to the last man, just as we fell on this field.“
The Battle of Napue
This was the final large-scale battle that took place on the Finnish front in the Great Northern War and essentially destroyed the Swedish army there. From now on I will call this a Finnish army, because it was made of Finns with very few Swedes (officers mostly).
After the decisive Battle of Poltava, the war had taken a serious turn for worse for Sweden. Russia and Denmark had planned a final blow by Denmark invading southern Sweden and, at the same, Russia keeping pressure up in the north, in Finland. Although the Danes had been repulsed in the Battle of Helsingborg (my recent playtest report), Peter the Great had already taken over the Baltic states and by the summer of 1713, his troops also conquered large parts of southern Finland. The Swedish-Finnish army was in a bad shape and did not offer battle until thei commander was replaced with General Carl Gustav Armfeldt.
The village of Napue, in the Isokyrö (Storkyrö) area, was the scene for the final and decisive battle in the Great Northern War in Finland. Image from Google Maps.
Armfeldt decided to engage the advancing Russians in Napue, a small village in the historical Ostrobothnia region along the road towards Vaasa, an important coastal town. It was a now or never moment and he also counted on the local villages to supply him with enough militia to contest the larger Russian army.
The Finnish army set up their regiments in such a way, that they would make strong assault against the enemy before they had fully deployed on the battlefield.
Map of the battle. Black are Russians and white are Finns. The Russian columns were advancing along the river from right to left. The river was frozen in February. Image National Library of Finland.
Armfeldt’s plan almost worked but he simply didn’t have enough troops. The 5,500 Finns were overstretched against the 11,000 Russians with almost half being cavalry. The Russian left infantry wing was engaged with a famous Carolean charge and almost crushed even with the reserves coming in. The plan was to break the line in one place and then roll it up and force the enemy to flee. It was very close until the 2,000 strong Russian cavalry bypassed the Finnish line on its left and hit the rear.
As the almost intact Finnish cavalry fled, the remaining infantry was overwhelmed and ended up being slaughtered. Local towns that had supplied militia lost 40-70% of their male population, and the whole army took 2/3 as casualties, mostly dead.
A mass grave of the fallen behind the Isokyrö church built in 1510s, on the location of an earlier wooden church from early 1300s.
The aftermath was brutal – the start of the Great Wrath. This is a time when the occupiers took a free hand of murdering, pillaging, raping, torturing, taking slaves, and so forth. For the next several years, these communities were savaged mercilessly. The intention was to create a scorched-earth buffer zone against Sweden to prevent any incursions in the future. It worked for sometime.
The battlefield is peaceful farmland today. People go about with their lives, perhaps occasionally remembering those who fell on the snow-covered field in February, 1714.
(Added June 13, 2025) The battlefield as defined in the online database managed by The Finnish Heritage Agency.
Experiments
As there are no games covering this battle (as far as I know), I have experimented using some existing systems with the hopes of being able to have a scenario released sometime in late 2025 or during 2026. It was quite encouraging to see that even with little preplanning, the game seemed to flow fairly historically, provided some special rules were added for historical accuracy.
From our beloved neighboring country, Sweden, comes a truly interesting Winter War game: Stalin’s Lost Chance (SLC). This hex-and-counter wargame from Three Crowns Games (3CG), using a chit-pull activation mechanic, covers the Soviet Union’s attack during the Winter War north of Lake Ladoga in 1939–40. The topic feels quite fresh—while games have certainly been made about, for example, the battles of Tolvajärvi, the operational scale is not typical. In this game, units are either Finnish battalions or Soviet regiments, or smaller detached formations. The game progresses in weekly turns until the end of the war, with a map scale of 5.5 km (~3.5 miles) hex.
The rough map area of the game in Ladoga Karelia.
I first tested SLC in autumn 2024 at the Baltic Wargaming Convention in Espoo, Finland and was immediately sold. Of course, the theme—Winter War at the operational level—had a big impact on that. After playing GMT’s Red Winter about a year ago, I was left wanting something a bit broader in scope, covering the decisive battles without the mass grind of the Karelian Isthmus. SLC isn’t exactly a short game, but I feel it depicts winter warfare quite well. The Red Army is tied to the road networks and can’t pursue the Finns into the forests—at least not in the early stages, before more ski troops arrive. On the other hand, they have plenty of brute strength—sometimes you just have to push forward with sheer mass and hope for the best.
The Red Army crosses the border via five main axes, and the Finns must first recover from the shock of war, scattered units, and Soviet tanks. Over time, reinforcements trickle to the front, and in my own games I’ve been able to stabilize the situation reasonably well—though it’s been a race against the clock. That’s just my own experience, of course, keeping in mind that the opponent might be experimenting a bit 😊 Around the midpoint of the war, massive Soviet reinforcements begin to arrive at the front, and the pressure on defense ramps up. Can the Finnish forces keep the Red Army at bay until the end of the war?
The game was designed by Stefan Ekström and Magnus Nordlöf. Assisting in the development is Australian Paul Shackleton, who is actively involved in 3CG’s projects. The game mechanics are part of the WWIIB series, built around a chit-pull activation system—each HQ to be activated next is randomly drawn from a cup. This adds unpredictability to the game, as it’s rarely clear who will move and fight in the upcoming turn. Otherwise, the system is traditional hex-based wargaming, involving probability assessments and random events.
Starting situation. In the picture, northwest is directly up, and Lake Ladoga is at the bottom. The number of units can be a bit misleading since the numerous Finnish units are usually small independent battalions (“ErP”). Photo Ola Palmquist.
The War Begins
Historically, the Soviet Union had concentrated the forces of the 8th Army in the area: two army corps comprising 120,000 men, along with tanks, artillery, and aircraft. The strength of these forces surprised the Finnish General Headquarters, which had only two divisions and various other miscellaneous units to oppose them. Later, the Red Army established two additional armies in the region—the 14th and 15th—to breathe new life into their stalled advance.
At the start of the war, Soviet tanks caused panic among the defenders. In the game, this is modeled by having the Finns suffer from “tank fear” for the first three turns (weeks)—given the Finnish Army’s lack of anti-tank weapons and training. This allows the Red Army spearheads to make significant early progress into Finnish territory.
However, Soviet units advancing along the coastal road are harassed by the Mantsinsaari fortress, whose guns could fire “into the rear,” that is, onto nearby islands and even the coastline, thus hampering movement along this vital route. The main defensive orientation of the fortress was toward Lake Ladoga.
On the right is Mantsinsaari located in Lake Ladoga, whose coastal artillery disrupts the Soviet Army’s movement along the coastal road (the reddish hexes).
During the first few turns, the situation is difficult for the Finns. Moving units is sluggish, as there are very few activations available. An activated HQ can usually move the units under its command within a range of 6–8 hexes. In addition, one independent unit within range can be selected to move—these include, for example, ski troops, detached battalions, and a large portion of Soviet tank units (at least in the early stages).
There are also different levels of activation chits: for instance, Colonel Talvela, who soon arrives in the area with the mission “to defeat the enemy forces advancing toward Korpiselkä and Ilomantsi,” can activate either Detachment Ekholm operating farther north or Detachment P (Pajari), which is active in the Tolvajärvi and Ägläjärvi area. On the Soviet side, each army can activate any of the division-level units under its command. More of these army activation chits become available later. The units are color-coded, so identifying the right ones on the map is straightforward.
Formations cannot be reorganized freely—one must operate as a whole: regiments or brigades belonging to a particular division must remain within the range of their HQ. If a unit strays off down some forest trail on its own, it can quickly run into trouble, as reactivating it may require moving the division HQ away from the main battle area to get closer to the unit.
In both of my test games, I played as the Finns against 3CG’s Jan, who controlled the Soviets, so I haven’t directly experienced the challenges the Soviets face with movement and launching attacks. Units are divided into two types—those capable of skiing and those that are not. With the Finns, this usually isn’t something you need to worry about, as most of them are forest-capable. That’s why I was nearly stumped when dealing with the more poorly equipped 23rd Division, which arrived later as reinforcements—how are these guys supposed to operate?
Units marked with blue movement points are in supply even in the forest, off the road, but only when next to a unit that is on a road. Only partisans operate completely freely. The picture also shows a few Soviet ski troops.
Tanks can only move along major roads and are generally at their best when used offensively. In the snowy forest terrain, supply works only and exclusively via roads or through an adjacent friendly unit. Only ski troops can move without such restrictions. Especially in the early game, the Red Army has only a few ski-capable units, meaning the bulk of the army is tied to road networks. More ski troops arrive later as reinforcements.
Tanks create disorder during the first weeks, and the Red Army has a clear advantage in activations.
Each turn includes a roll for random events, and in our game the die favored the attacker, triggering artillery barrages that caused additional disruption for the Finns. These events vary based on historical situations and occurrences, covering things like Lotta Svärd (helps units recover), Lake Ladoga freezing over (allows movement across the ice), “Motti-Matti”, or poor flying weather.
At the beginning, the Soviets understandably have the initiative, so many Soviet activations are drawn from the cup—typically 5 compared to Finland’s 2. This balance shifts from turn to turn depending on the historical overall situation. Once the initiative moves to the Finns, more Finnish activations become available.
Tanks charge toward Ägläjärvi and onward in the direction of Tolvajärvi. The Finns have only scattered units in the area.
Parade March to Helsinki…
The Soviets were expecting the Finnish working class to rise against their “oppressors” and thus gain a quick win – they even brought their parade equipment along. Neither happened.
As the Soviet tanks clear the way for the infantry to advance, the divisions turn into snake-like columns crawling through traffic jams. They spread out along the sparse forest roads toward the west, aiming to reach the rear of the Isthmus Army and gain access to Finland’s road network.
Randomness is introduced by cup activation (chit-pull). It’s rarely certain whose turn it will be next, so clever breakthrough or encirclement attempts can fall apart if the wrong group activates next. The Red Army is forced to attack constantly with low odds, but air support can be brought into areas of concentration, which the Soviets have in ample supply: initially, four units to the Finns’ one. The aircraft are either single- or double-sided, and they increase the combat odds accordingly by one or two levels (e.g., 1:1 becomes 3:1). This has a significant impact on the battle.
However, aircraft can’t be used freely because if the full power of a double-sided air unit is used, it takes two turns to recover. First, it goes into the Grounded box, from which it is moved to Refit on the next turn. If only the single side is used, the unit goes directly to the Refit box and thus recovers more quickly. The Soviets can also disrupt Finnish movement on roads or railways at strategic points by bombing the road network.
Red Army air units in different states of use. The more efficiently they are deployed, the longer it takes for them to recover back to operational readiness.
Traffic jams in the forests. The Red Army is mostly tied to roads and other routes, so their advance slows down and the spearhead keeps taking hits.
The Finns are forced to block key routes and must sometimes make tough decisions—should they try to stop the enemy by fighting now, or fall back to better positions and wait for reinforcements? Reinforcements arrive at the front painfully slowly, and movement from one place to another is far from swift. Behind the front lines, movement along roads or railways is naturally more efficient, but Zones of Control (ZoC) stop movement in the usual way. At the same time, the player must keep an eye on the distance to the HQ, as any unit that’s too far away can easily become stuck in place.
Reinforcements are steadily flowing to the front. The Finns initially scrape together forces that manage to halt the Red Army’s advance. After a shaky start, the Russians make a renewed effort with massive reinforcements.
Finland’s defense is based on two fundamental principles: first, forcibly blocking the roads, and then attempting to maneuver into the enemy’s rear to cut off their supply lines. Later, if the front can be stabilized, counterattacks become possible, along with efforts to form mottis (encirclements). Units must be used sparingly, but at times risks simply must be taken—for example, to prevent a breakthrough into the rear.
… Stalls in the Freezing Cold
When supply lines are cut, it’s essential to fix the situation. Usually, it’s Brother Ivan (the Soviets) who finds himself in trouble, and the parade march fizzles out once again. I’m pretty sure my opponent Jan was a real gentleman and gave me quite a bit of leeway during the game—many times I was able to flank into the rear and sever supply lines heading east. In addition, he often attacked with low odds, but on the other hand, his “legendary dice luck” kept helping me over and over.
At times, the Soviet situation was simply that the lead units needed to be sacrificed just to bring fresh troops forward from the rear and make use of the HQ more efficiently. Losses kept mounting, but then again, the attacker doesn’t exactly run out of troops anytime soon.
Losses at the end of Turn 7: destroyed Soviet units on the left, Finnish units on the right. Of course, damage has also been dealt to units still on the map.
A similar situation for the Russians during the fall 2024 prototype test. Quite a hefty pile…
Once I managed to shore up the defenses, I was able to start launching counterattacks on the Finnish side. I kept looking for weaknesses in the Soviet lines—and several emerged in different sectors. I was able to practically destroy the Red Army—perhaps a bit too easily—across the entire northern sector of the front. This freed up troops to move toward the shores of Lake Ladoga, where the pressure had been consistently much heavier.
The beginning of a motti pocket. Breaking out is not easy once you end up in this situation.
The remnants of the Soviet 139th Rifle Division have been encircled. South of Tolvajärvi, a second pocket is forming, containing elements of the 56th and the reinforcing 75th Divisions.
A motti (encirclement) diorama at the Military Museum of Manège @ Sveaborg fortress in Helsinki. Russians have dug in along the road and are pinned by the surrounding Finnish light units.
On the “southern front,” that is, along the shores of Lake Ladoga, we ended up bogged down in a stalemate. Both sides kept sending reinforcements to the area, and once Lake Ladoga froze over, the front widened—first for infantry, and later for tanks as well. The Finns had to respond by stretching their line, which in turn required additional troops. The two Finnish armored trains that arrive later as reinforcements provided some help along the railway. Only later, while writing this, did I realize how fierce the fighting around the Kollaa area had been on both sides. This is the area where also the sniper Simo Häyhä operated (there is also a movie coming). By encircling the Soviet spearhead units, we managed to destroy most of them—but some still escaped, which annoyed me greatly 😊. The flank threat worked well, meaning the Soviets couldn’t just mindlessly push forward without risking costly encirclements.
Did Kollaa hold? In this game, it didn’t hold—the village was lost, although the defensive line managed to stop the “budyonovkas” at the next hex.
The Red Army’s parade march stalled even before reaching Koirinoja, despite their furious efforts. The final nail in the coffin was the arrival of Jaeger battalions transferred from the Karelian Isthmus. This marked the end of our game—at the end of Turn 8—when we decided to call it. The situation along the shores of Lake Ladoga had reached a standstill.
Final Words
Stalin’s Lost Chance is not a one-evening game. We spent about 9 hours and managed to get roughly halfway through the war—and the game. It would have been great to continue further, especially as strong reinforcements had just started arriving to support the Soviets. I’m admittedly a relatively slow player, partly because if I’m unfamiliar with a system, even the basics take time, and I end up flipping through the rulebook now and then. On the other hand, 3CG has several games that use the same system, so over time the mechanics will become familiar. Jan even stayed up later that night playing solo, pushing deeper into Finland with his new reinforcements.
We didn’t calculate victory points, but I’m sure that, for the second time, Finland pulled off a straight-up sudden-death win.
For my part, SLC is going straight into the classics section of my game shelf—and not just because of the theme. This is also the first game I’ve ever ordered two copies of, and at under 50 euros, the price is quite reasonable. Stalin’s Lost Chance is an excellent combination of a clear rules system, varied combat styles and events, and great atmosphere. A few small things left me wondering—how feasible is the Soviet offensive in the later game? Did my opponent go too easy on me during the playtests? Do encirclements collapse a bit too easily? Then again, forming “motti” pockets isn’t all that easy either, so perhaps within the framework of the mechanics, we’re simply witnessing the larger endgame arc—it’s not meant to be a detailed simulation.
Other games from Three Crowns Games using the same WW2 mechanics focus either on the battles between Germany and the Soviet Union, or the North African theater. For example, Polar Storm covers the 1944 Petsamo–Kirkenes operation, where German forces were pushed back into Norway in the far north.
Stalin’s Lost Chance starts shipping during June 2025. If you preordered the game, it will ship already in May.
I was told already a few years ago to have a Vassal module for the game… About a year ago I took a look at it and quickly left – it just looked like too much at the time. So, here I am again, taking another shot at it and now it’s kind of moving forward. Vassal isn’t the easiest thing to get into, but I am slowly getting the hang of it.
A draft of the module with some counters thrown into the July 8th battle.
The first objective is to facilitate testing of the still unfinished game, and the second one, is obviously to have a Vassal module for the game.
My first problem was really to get the counters imported into the module, but that turned out to be a fairly straightforward task – I asked ChatGPT to write me a couple of scripts to make individual image files out of the large files I get from my artist. A few python scripts and some tweaks later, I had them. Not perfect, but good enough to use in Vassal.
There are many more advanced functions I still struggle with but ultimately, I hope to have a digital helper – and not the full game.
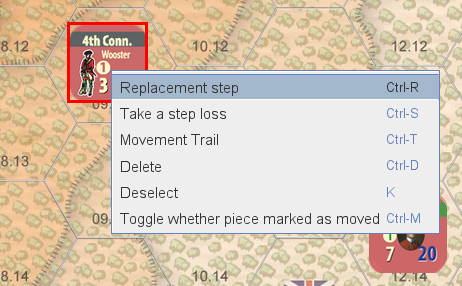
Adding some logic, like taking step losses took some time to figure out. I ended up doing most of this manually as importing a data file looked like a messy option.
I am also adding some of the necessary components into the module.However, I still need to find a way to add some counters to these minimaps.
It’s been a lot of work to add all game counters with their traits.
Once I have the main components in the game, I’ll start testing myself and perhaps with a small circle of “testers”. Obviously, I’ll need less desk space and can also save the game, “put it away” for a while, and continue later. This is always an issue with kids, dogs and a spouse in the house…